| Author |  Topic Topic  |
Zagato
V4 Mad

United Kingdom
812 Posts |  Posted - 03 Mar 2017 : 14:34:31 Posted - 03 Mar 2017 : 14:34:31  
| Just the job 
|  |
|
Iain G
V4 Fan

United Kingdom
159 Posts | Posted - 03 Mar 2017 : 15:34:26
| Hi Betsy67,
looking at your pics showing measurement of pressure plate position.......I think it still too low. I would have it slightly proud instead of sub-flush like your pics. More shims needed!
Iain
Iain G | |
|
melle
V4 Guru

United Kingdom
3833 Posts | Posted - 03 Mar 2017 : 15:40:10
| I think the first picture is before (without shims) and the second after (shimmed)? Photos can be deceptive but it looks right to me in the second one?
www.saabv4.com | |
|
Betsy67
V4 Fanatic

United Kingdom
409 Posts | Posted - 03 Mar 2017 : 16:16:24
| Definitely proud. Quite a few trial and error additional shims added.
One of the 3 arms required a little persuasion in order to maintain tension against the central plate. There was always a light rattling noise from here whilst the engine was running, so hopefully now cured.
Thank you for the comments | |
|
Iain G
V4 Fan
United Kingdom
159 Posts | Posted - 03 Mar 2017 : 20:10:43
| Oops yes looking again at the second pic I can see you are about right
Nice one
Iain
Iain G | |
|
Betsy67
V4 Fanatic
United Kingdom
409 Posts | Posted - 06 Mar 2017 : 13:21:57
| Errrr, never quite intended to go this far! Also removed the brake and clutch cylinders after this shot, but I am drawing the line at the steering rack.
Think I've spent well over 4 hrs stripping the heater box back. It's quite a prominent feature under the hood, so it needs to be clean and shiny.
| |
|
Zagato
V4 Mad
United Kingdom
812 Posts | Posted - 07 Mar 2017 : 08:01:47
| Lol, what have we started  I was going to leave the steering rack in as well. You managed to get the heating valve thingy out, I got stuck on that one. I will have another go this week... Must keep up! I was going to leave the steering rack in as well. You managed to get the heating valve thingy out, I got stuck on that one. I will have another go this week... Must keep up!
| |
|
Betsy67
V4 Fanatic
United Kingdom
409 Posts | Posted - 08 Mar 2017 : 12:49:12
| 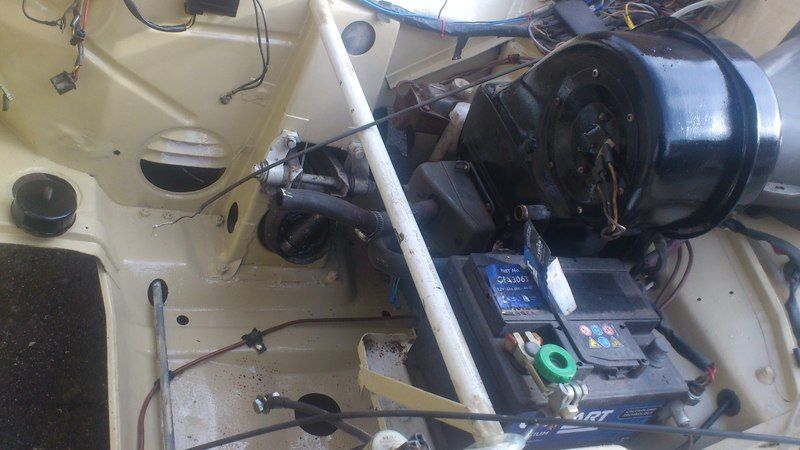
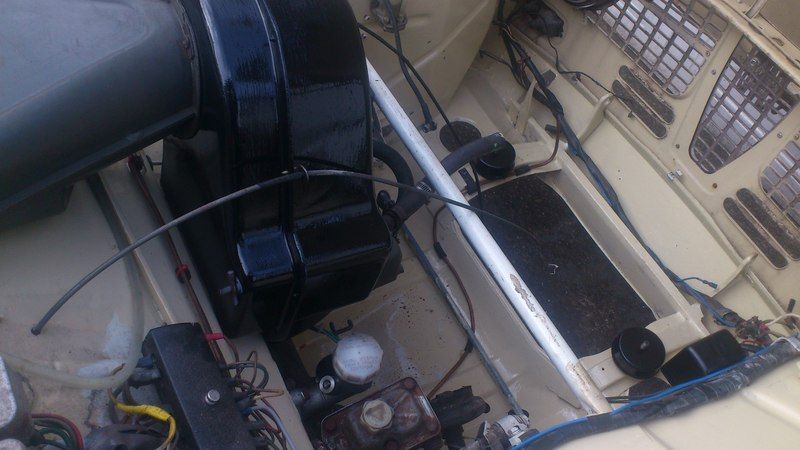
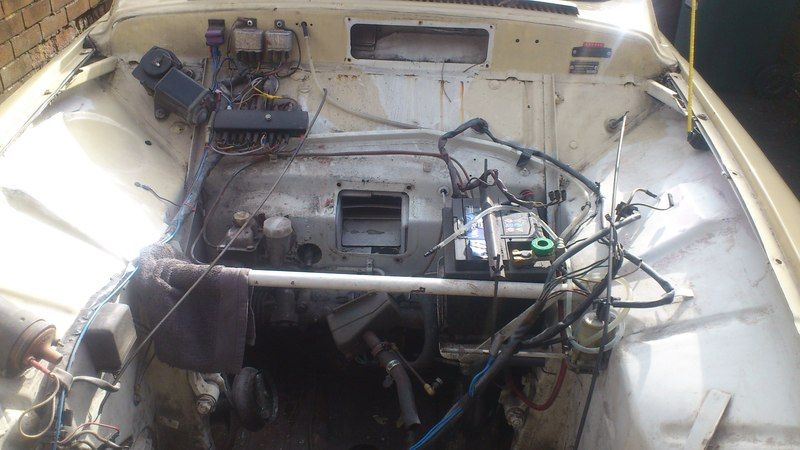
Progress as of yesterday evening. Yes, still some bits to do namely strut brace, top of battery tray and A/Roll bar. One advantage of painting by brush is that I can plan my approach of which bits to paint, whilst still moving along in stages of reconstruction.
These shots don't show the bits that I'm unhappy with ! I've left the floorpan between the turrets and cabin bulkhead. I used a primer rattle can, which was fine. However any attempt at brushing over this removed the primer coat. I know I didn't give it 100% in this area on the cleaning, so not unexpected.
Not feeling at all motivated today as 2 full days (10hrs or so yesterday !) has removed any that I had left. Can't even bring myself to do some small painting jobs of removed items now in the garage
I'm very impressed with the accelerator pedal/rod and it's simplicity of design-pure SAAB Removed cleaned, painted and reinstalled with a dab of Copperslip. It also came into mind yesterday how few tools I had used during this operation. All pretty standard spanners, drivers and sockets (apart from the engine hoist)
Hopefully tomorrow will bring some motivation and I can finish the small jobs off and be ready for engine install 
I have no idea how you would go about spray painting the lower regions of the engine bay along the front panel area - 'chapeau' to anyone capable of doing this. |
Edited by - Betsy67 on 08 Mar 2017 12:54:35 | |
|
Zagato
V4 Mad
United Kingdom
812 Posts | Posted - 08 Mar 2017 : 13:46:02
| Wow that was quick work . Well done. Looking good...I am just trying to look up how to get the heater box out!
Spraying the engine bay is a particularly tricky job apparently, one guy uses a really small spray gun specifically to get under the nooks whilst using a normal spray gun for the rest. Hand painting those bits would be alright I would have thought as you cannot see them anyway with the engine in I don,t think. Ok for anything but a concourse car I suppose. Nothing I will need to worry about
| |
|
Woody
V4 Guru
United Kingdom
2764 Posts | Posted - 08 Mar 2017 : 16:02:33
| | Great stuff, keep it up. Silver Sand? | |
|
Betsy67
V4 Fanatic
United Kingdom
409 Posts | Posted - 08 Mar 2017 : 16:09:58
| | Don't think it's a Saab colour from what the previous owner said ! Ford pastel white rings a bell. | |
|
James Ranaldi
V4 Guru
United Kingdom
1475 Posts | Posted - 08 Mar 2017 : 21:53:52
| It looks very close to my 1968, 96 which is Silver Sand.
Great work, I am following this with great interest.
James
1968 V4, LHD
1984 99 GL
1992 C900i Convertible
1993 C900 LPT Convertible | |
|
Derek
V4 Guru
United Kingdom
2191 Posts | Posted - 09 Mar 2017 : 12:01:33
| | If a Ford colour it looks like one used on MkII Escorts and similar year Mk4 Cortinas. Something I would call "Putty" but don't know what Ford called it. |
Edited by - Derek on 09 Mar 2017 12:02:16 | |
|
Zagato
V4 Mad
United Kingdom
812 Posts | Posted - 09 Mar 2017 : 13:29:19
| What ever it is I prefer it than the original white and it looks very close to the original SAAB sandy colour
| |
|
Betsy67
V4 Fanatic
United Kingdom
409 Posts | Posted - 10 Mar 2017 : 09:02:04
| The results of yesterday morning's Betsy time. I had an interview arranged for the afternoon, so tried to keep my mind away from that for a while.
Didn't really know what I intended doing, but knew I needed to be out of the house for a while. I had absolutely no intentions or thoughts of mating the engine and box back together. However, my usual mass of scattered parts on the work bench didn't provide much inspiration. The motor was uncovered from the tatty piece of garden/B&Q tarp and one thing lead to another etc, etc.
As suspected and mentioned previously, the clutch plate needed to be realigned before the two would join together in blissful harmony. a good time to reset the clutch travel and judging by the amount I had to back out the adjuster the shims would appear to have done as intended. Fingers crossed for a firmer clutch pedal 
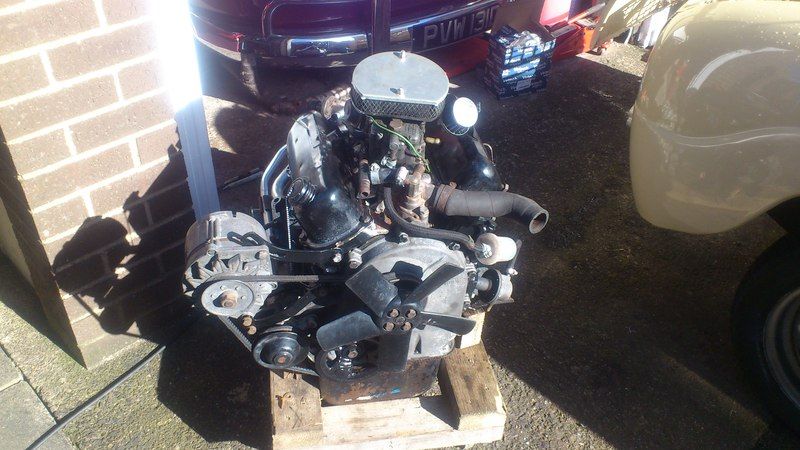
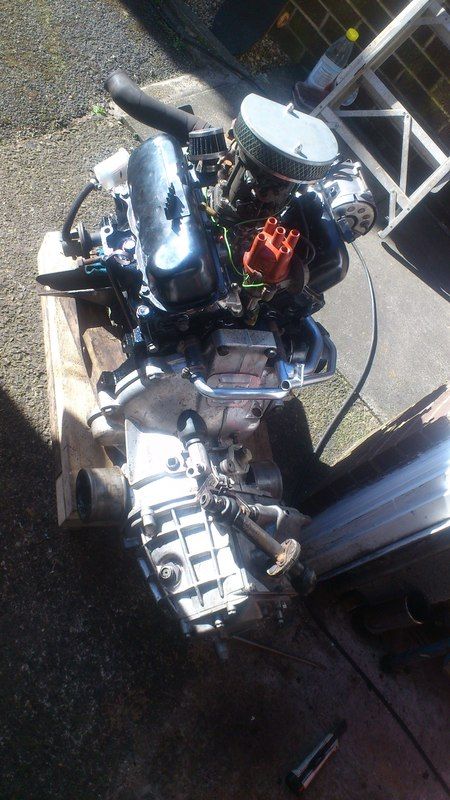
Progressed as far as I could, but there are still some bits left to do. I always carry some spare rubber hose ( the wife likes that sort of thing )but,I didn't have quite enough to complete the cooling system. I need to re-route the pipes to run around the R/H rocker cover as opposed to over it! Any pieces of pipe which looked perished have also been replaced. I really should have taken a picture of the fuel pipe as this was absolutely 'gone'
Being a tight arsed Yorkshireman I tend to use what I have lying around rather than buy something. The metal coolant pipes have been sprayed with 'chrome' spray. I used this on my old bumpers and it seemed quite resilient, so thought I would give it a try - time will tell  . .
Keep reading - nearly there
Having cleaned and painted the throttle linkages, they got a trial fit. Mmmmm, not quite getting full travel and doubtful if the second choke is opening. I fabricated another bracket of similar design but lifting the pivot up by about half an inch or so. This looks like it's done the job. The sheet I used is a little too thin and flexes slightly. Metal fatigue would eventually set in and cause a fracture- even I couldn't bodge a roadside fix if that happened!. I'll remake it a in thicker material later once the motor is in. The linkage will then be in it's true location and can be properly assessed.
Just clicked on 'preview' (always makes me think of 'all the right notes, but not necessarily in the right order
') and the pictures don't look all that impressive considering all the hours that have gone into it! The rocker covers are definitely the focal point and could do with a little attention. I have another 2 sets and powder coating in a brighter colour could be an option. A new air filter has been on the shopping list for a while. I think it's now jumped up the list a few places
Not sure what to do with the sump I don't have access to it where it is now and once in the car it won't be any better. I'll try and sort something out - probably at the time of install. | |
|
| Topic | |
