| Author |  Topic Topic  |
melle
V4 Guru

United Kingdom
3833 Posts |  Posted - 25 Jul 2014 : 15:09:54 Posted - 25 Jul 2014 : 15:09:54  
| quote:
Originally posted by Dirtbiker
are all four rear side windows the same shape?
No, they're not unfortunately. Left and right are identical, front and rear are different.
1970 96V4 "The Devil's Own V4"
1977 95V4 van conversion project
1988 900i 8V |  |
|
Dirtbiker
V4 Guru
United Kingdom
1061 Posts | Posted - 25 Jul 2014 : 17:21:36
| Thanks Melle,
I guess you know this from your CAD drawings for the van conversion! Pity.
Cheers
| |
|
melle
V4 Guru
United Kingdom
3833 Posts | Posted - 25 Jul 2014 : 17:38:26
| I actually never made a CAD drawing but simply traced the glass onto steel, much easier. But indeed, that's how I know. I'm pretty sure the fixed rear side windows off Scandinavian cars have the same glass as yours. So if you could get those rubbers and remove the metal glass surround? I can ask at the Danish forums?
1970 96V4 "The Devil's Own V4"
1977 95V4 van conversion project
1988 900i 8V | |
|
Dirtbiker
V4 Guru
United Kingdom
1061 Posts | Posted - 08 Aug 2014 : 18:16:34
| Hi All,
Melle - thanks but I reckon these can be made serviceable.
Had a few hours here and there on the 95 this week so here goes...
Sorted out the screen corners. They didn't need much metal letting in and I got away with leaving the dashboard in place.

A lick of paint.

And the screen back in. I've ordered a new chrome insert from Malbrads.

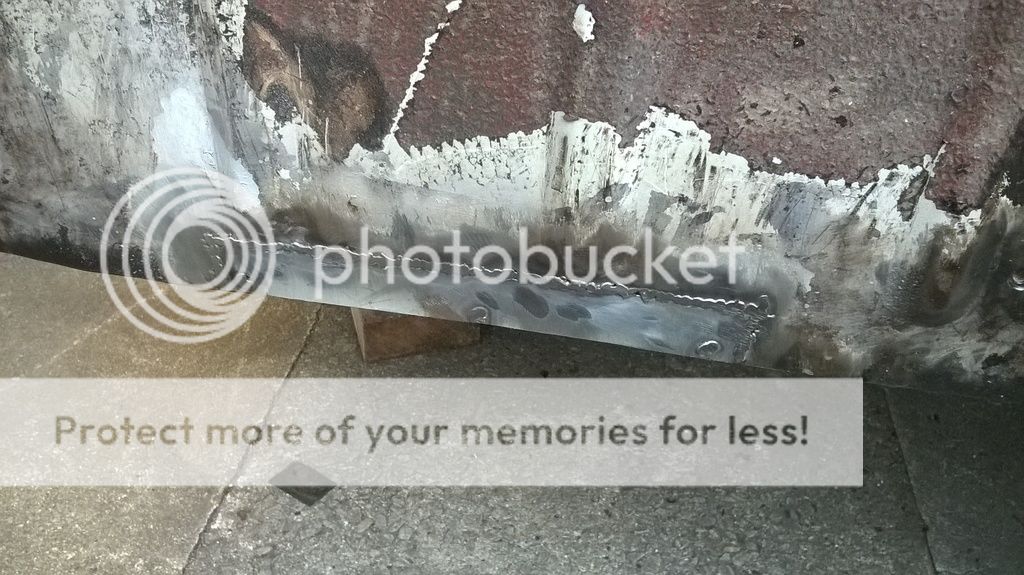
Next up it's time to chop out some grot. Started with the O/S sill as this was nearest. First up a small hole behind the front jacking point. Despite a bit of surface rust all four jacking points are rock solid.

Then a hole under the box section running across the car under the seats.

Then I decided to investigate a repair behind the trailing arm mounting point. This looks like a very old MOT repair and was solidish but unsightly...

Could have left this alone but chop, chop, chop...


If the weather holds off tomorrow I should get a chance to make some progress with this lot.
Cheers |
Edited by - Dirtbiker on 26 Sep 2019 22:23:03 | |
|
Dirtbiker
V4 Guru
United Kingdom
1061 Posts | Posted - 08 Sep 2014 : 21:02:08
| Hey All,
Little bit of progress... Fitted the new chrome strip in the windscreen - looks lovely but don't seem to have a photo.
Sorted out the grot where I had been chopping last time.
That's it for now but hoping for a full day at the weekend weather permitting.
Cheers |
Edited by - Dirtbiker on 26 Sep 2019 22:25:31 | |
|
Dirtbiker
V4 Guru
United Kingdom
1061 Posts | Posted - 13 Sep 2014 : 17:57:27
| Hey Saabers,
Had a full day on the 95 today.
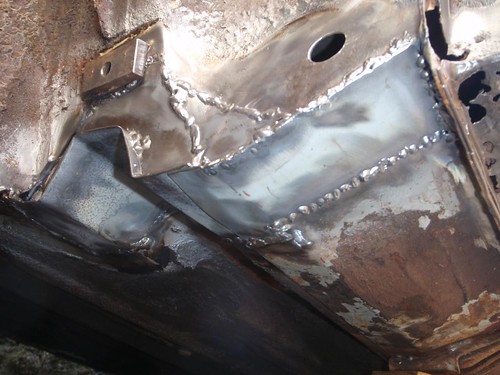
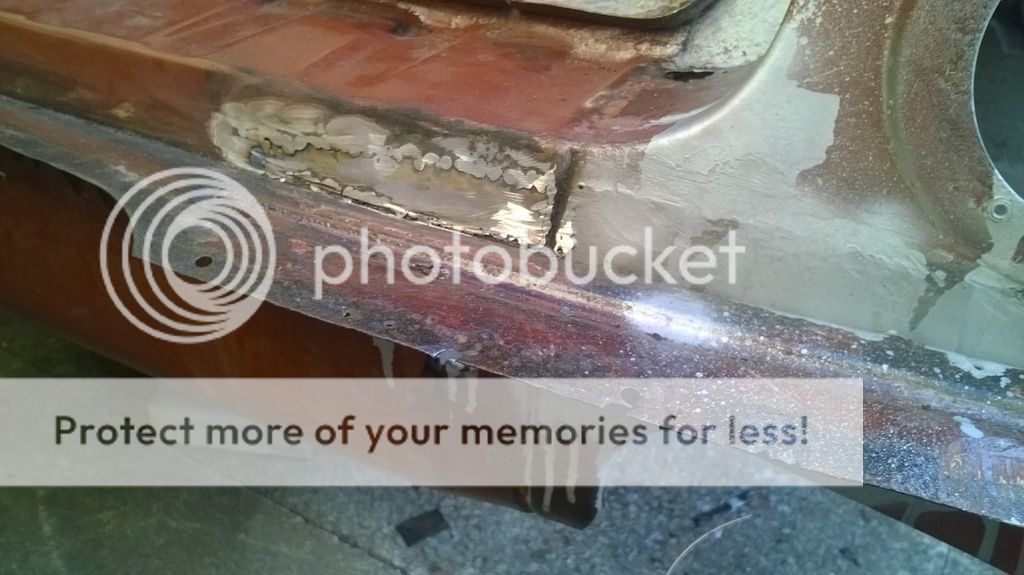
Repair to the valance behind the drivers door:

And made some good progress with the floor:

This was made a lot easier because Guy's Dad had already made up some repair sections - thanks Ray!
Also welded up the two holes in the sill but didn't get a picture. If all goes to plan at work this week I should get another full day next weekend - aiming to get all the welding done in two or three more sessions...
Cheers |
Edited by - Dirtbiker on 26 Sep 2019 22:27:22 | |
|
tommygoldy
V4 Fan

146 Posts | Posted - 13 Sep 2014 : 19:18:31
| | Good work! Keep at it! | |
|
Dirtbiker
V4 Guru
United Kingdom
1061 Posts | Posted - 27 Sep 2014 : 18:46:54
| Hi All,
Bit more done on the 95 today, mostly steps backwards though...
More grot than expected at the back corner of the engine bay. Spent ages chopping and cleaning. There is a previous repair to the double skinned sectioned which I was tempted to remove but it's pretty solid so cleaned up from inside the engine bay and covered in rust converter.

Ended up here with some repairs underway to the engine tray. Was hoping to get the floor finished today but spent most of my time faffing with the engine tray.

In a moment of distraction managed to do this...
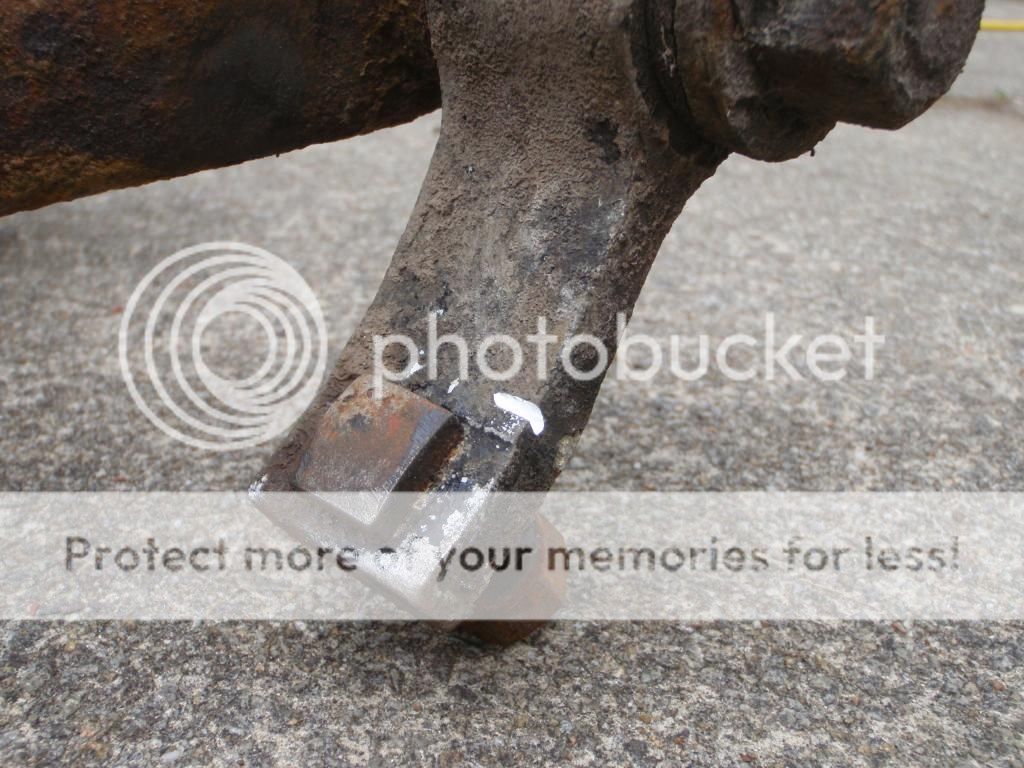
So the lower wishbone had to come off to be replaced...
But all was made good by the arrival of these in the boot of the car:

Cheers! |
Edited by - Dirtbiker on 26 Sep 2019 22:31:42 | |
|
Dirtbiker
V4 Guru
United Kingdom
1061 Posts | Posted - 15 Oct 2014 : 19:45:14
| Hi All,
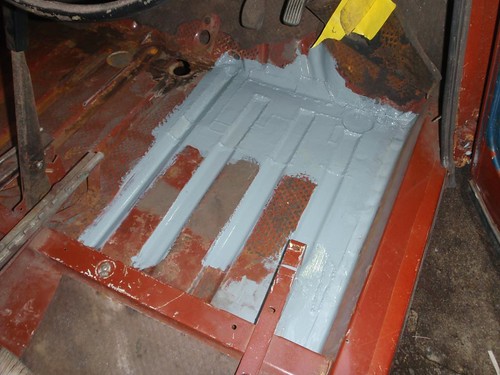
A little update on this one. Made some repairs to the engine under tray then cut a big flat piece for the floor:

Welded in:

And with a lick of paint:
The next step is to seam seal then another coat of paint with stone chip underneath. I have already stone chipped the repairs up to now and filled the sill with Dinitrol. The plan is to try and get all welding complete and sealed before the bad weather sets in. There is also a plan to build a garage which will involve finding somewhere else for the car to live short term.
Cheers |
Edited by - Dirtbiker on 26 Sep 2019 22:35:15 | |
|
Redders
V4 Beginner

United Kingdom
83 Posts | Posted - 15 Oct 2014 : 23:14:36
| Great work, it all looks so familiar 
I wish my windscreen surround was as good as yours!!!
Florence the 73 V4 95 - undergoing restoration! 1985 C900 T16S - Restored. | |
|
James Ranaldi
V4 Guru
United Kingdom
1475 Posts | Posted - 16 Oct 2014 : 12:02:32
| Impressive 
1968 V4, LHD
1984 99 GL
1992 900i Convertible | |
|
Dirtbiker
V4 Guru
United Kingdom
1061 Posts | Posted - 16 Oct 2014 : 14:16:11
| | Cheers Guys! Lucky with the windscreen surround on this one - always seems the same story, screen leaks and floors rot... Keep up the fast progress on Florence - still jealous of your organised work space! | |
|
Dirtbiker
V4 Guru
United Kingdom
1061 Posts | Posted - 15 Apr 2015 : 22:09:01
| Right then, keen to get this one on the road for the summer...
Previously had completed the windscreen surround, a bit to the os sill and the os floor.
Next up the os front corner just needed a clean and some surface rust treating then a spray with stone chip.

Then on to the rear os quarter just behind the rear axle.

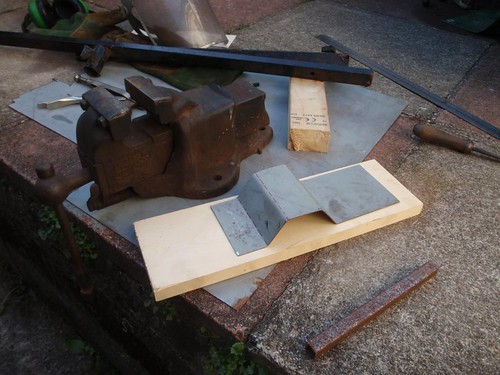
Bought some of these sheet metal clamps - very handy!


Chop chop chop...


Held off on tidying the bit on the left properly as ordered a powerfile - might be a bit more gentle and hopefully quieter than the grinder.
Away this weekend but hopefully resume progress next week.
Cheers |
Edited by - Dirtbiker on 26 Sep 2019 22:46:31 | |
|
melle
V4 Guru
United Kingdom
3833 Posts | Posted - 16 Apr 2015 : 08:50:31
| Great work again Gareth!
I was given a power file 15 years ago and hardly ever used it, always found it a useless hobby tool... Until last year I had some welds in nasty corners to dress back and asked at the Dutch forum how to go about. Someone suggested a power file and I'm using it all the time now!
www.saabv4.com | |
|
Dirtbiker
V4 Guru
United Kingdom
1061 Posts | Posted - 16 Apr 2015 : 10:03:18
| Hi Melle,
Just ordered a cheap Silverline one to see how I get on.
Won't be getting much done this weekend as off to Nijmegen!
Cheers | |
|
| Topic | |
