| T O P I C R E V I E W |
| Lupo | Posted - 11 Oct 2012 : 20:33:03
Hi guys,
sorry "John-saab" I probably didn't mentioned that befor rotating it the body skeletron was deprived of all components (motor as well) just bare metal sheet.
So I continue with cutting, but the ugliest work wos to get rid of the tar based rust protection. I tryed different recommended methods, but the most effitient was, flame (gas o petrol gadget) spattle, haevy gloves and a mask on face. After that hours of cleening the rests and old mud with high speed angle grinder - steel disc brush. Coal mine was nothing to my garage there.
OK let's go to cutting again:

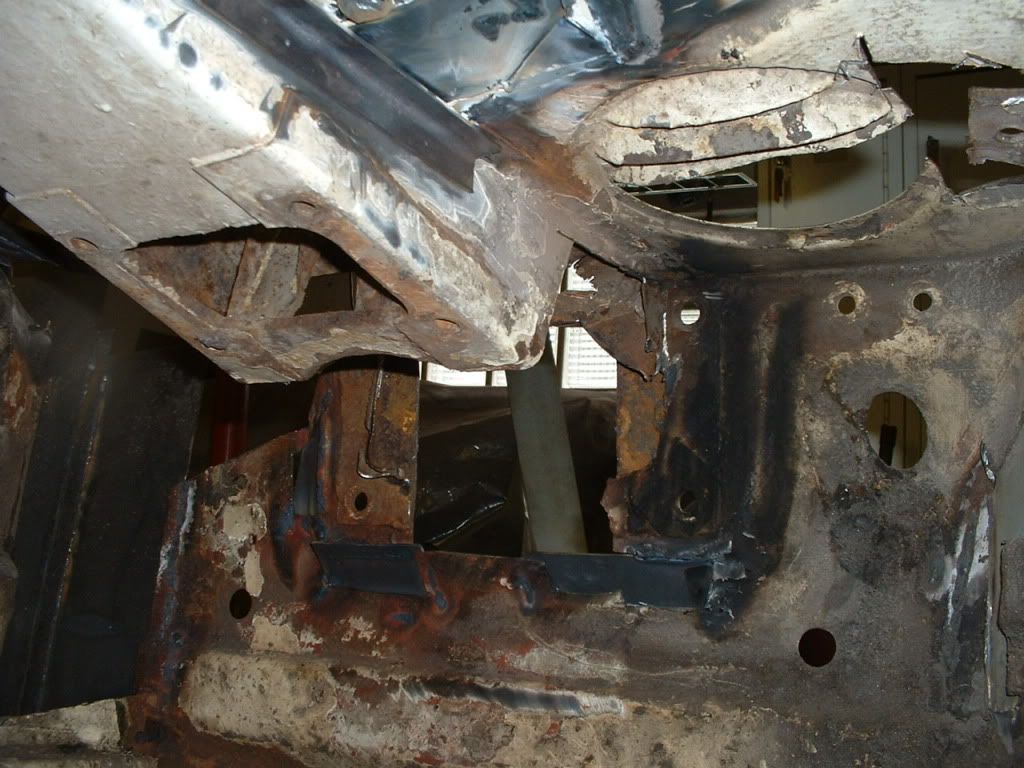
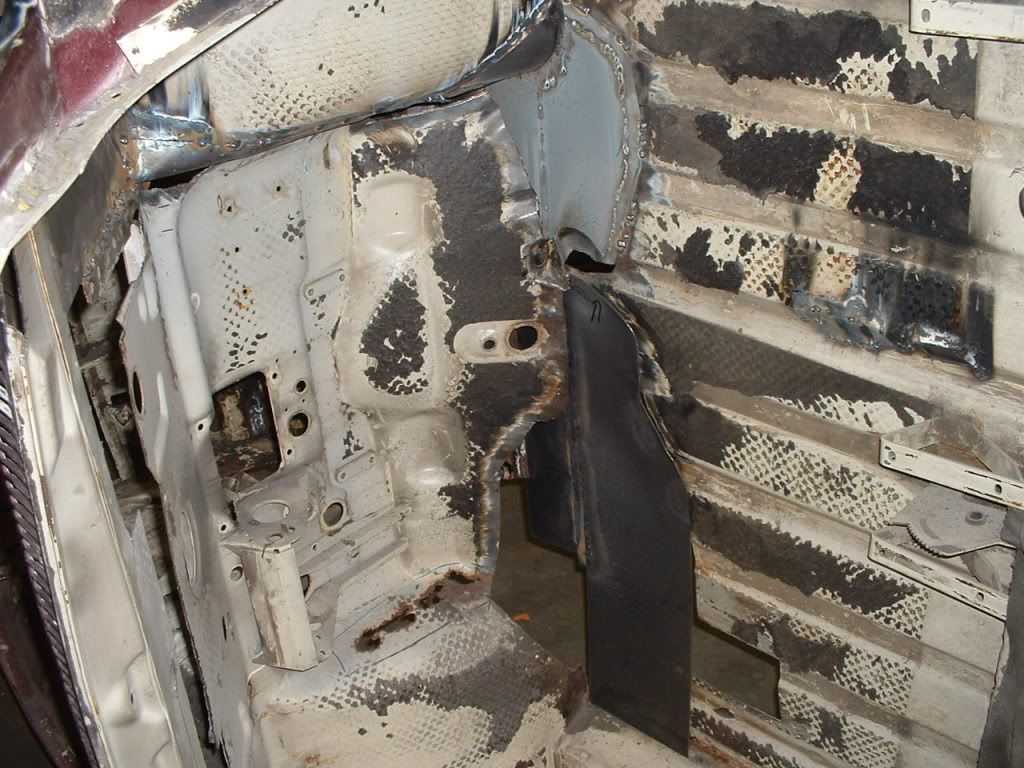
rear left inner fender ( see the upper spring support, was very easy to cut, there was nothing)
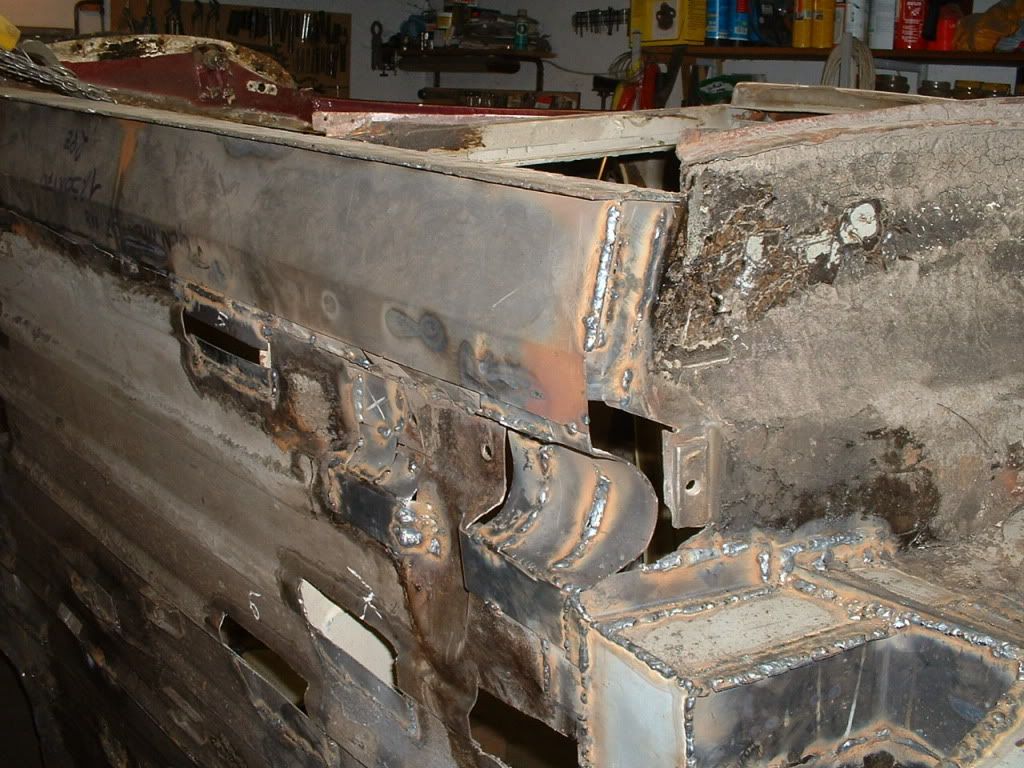
left rear axle and bracket area partly welded
front left suspension area with support post partialy cut
front inner fender pertialy welded
left suspension post in "air"
the same, inside view
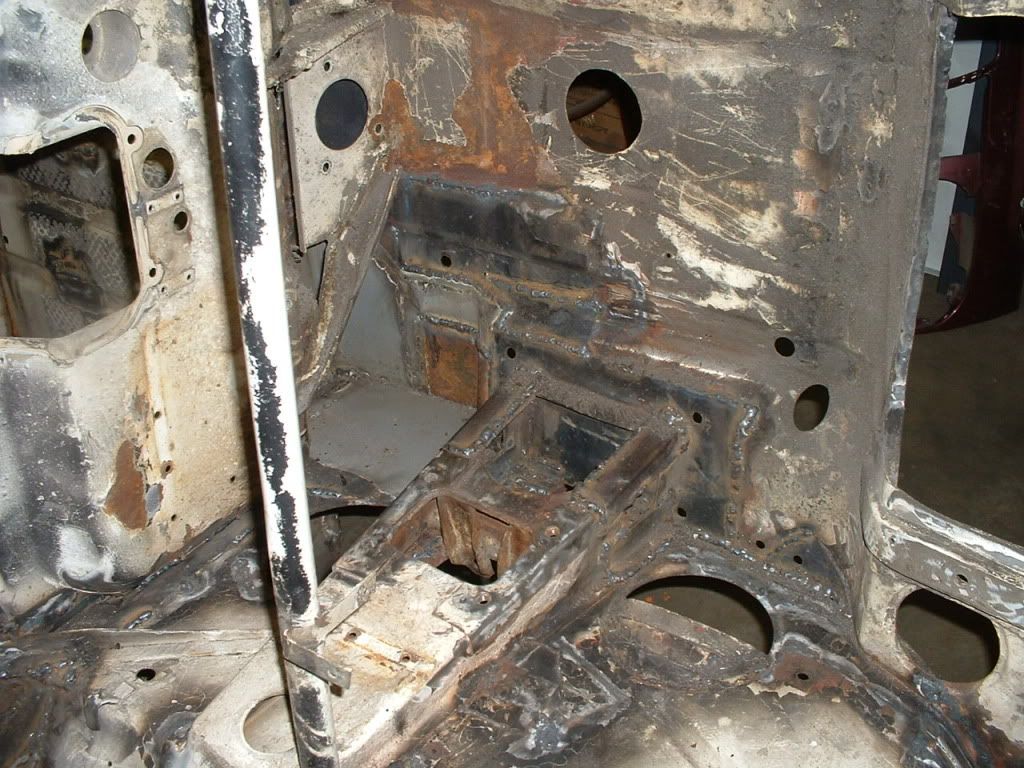
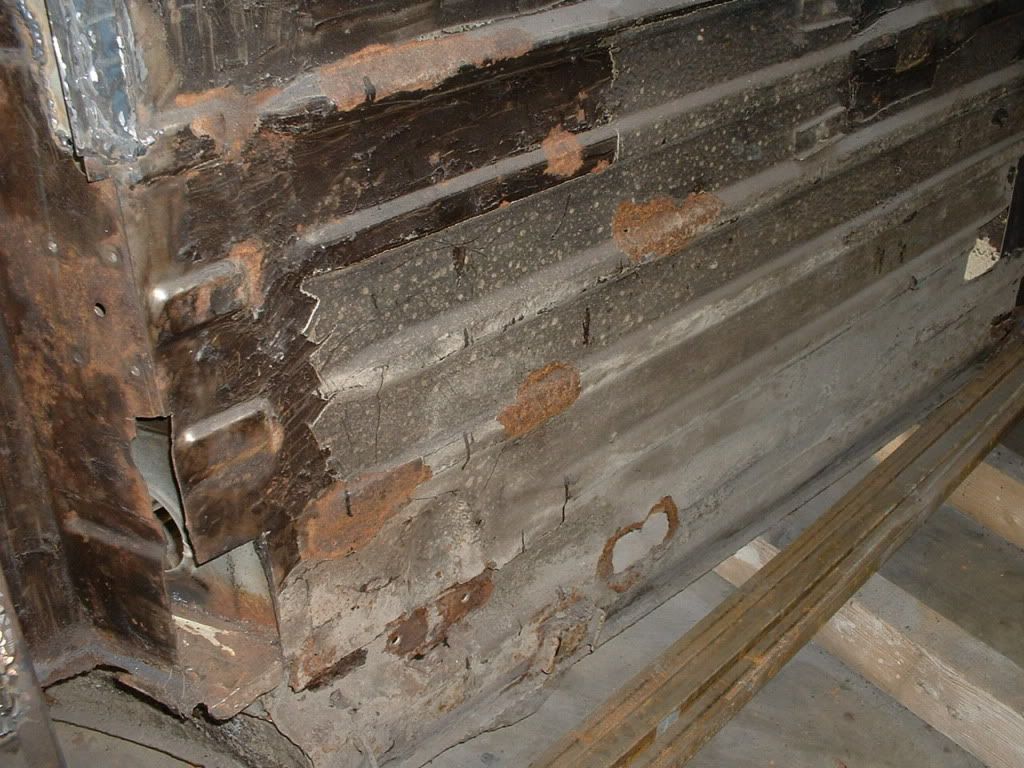
the right one already "healed" (bottom foot plate 3 mm thick)
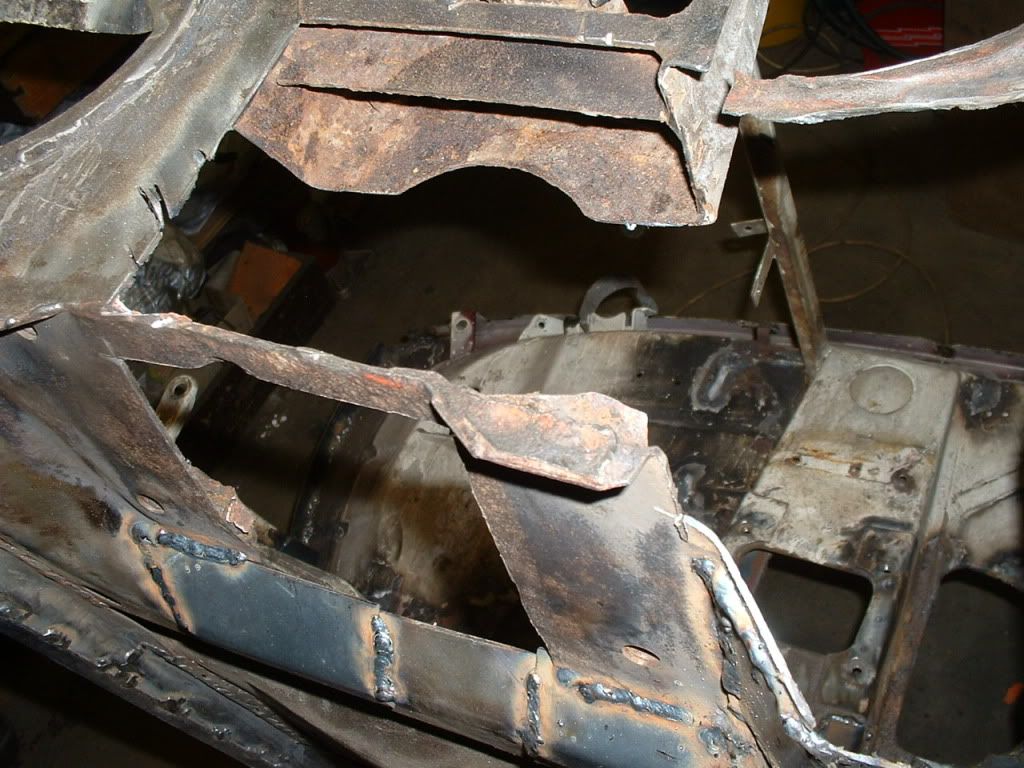
driver's floor (lucky not lost my feet befor)
the same but nice view from bottom
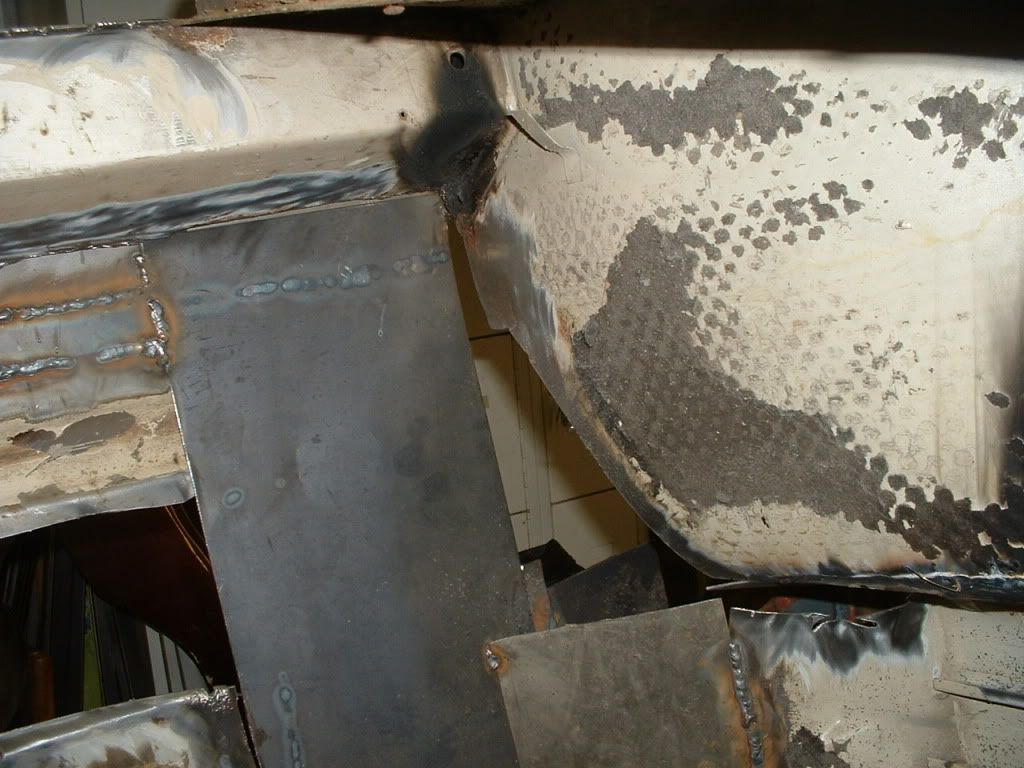
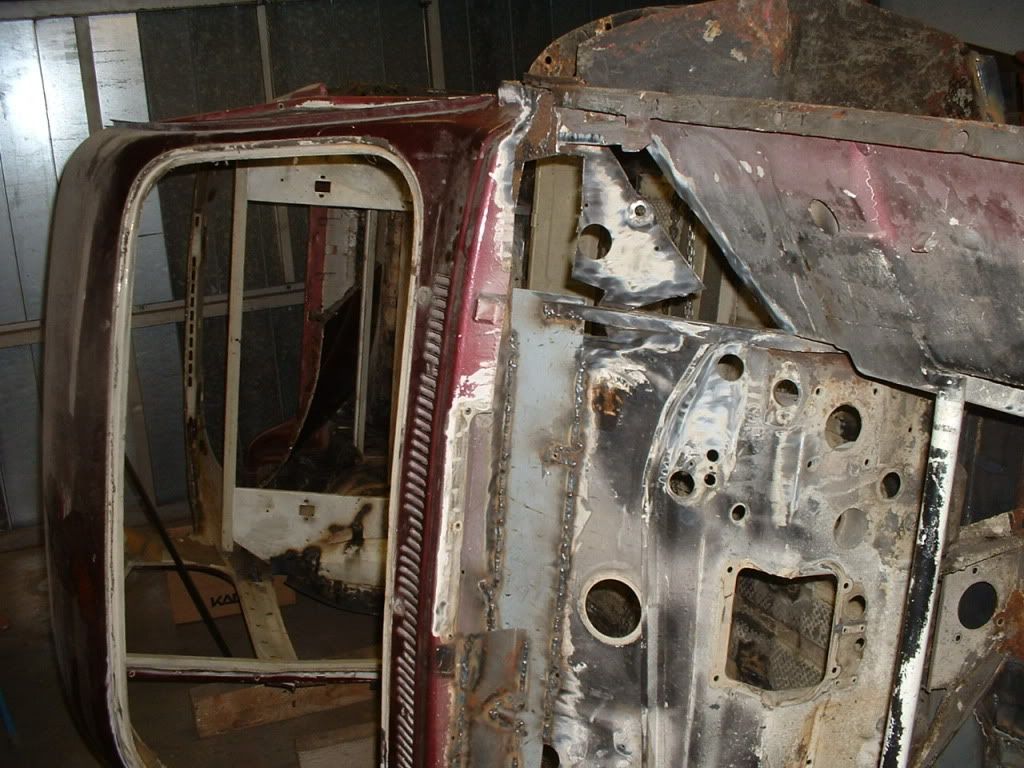
seen from passenger plase ( note the front panel to window frame)
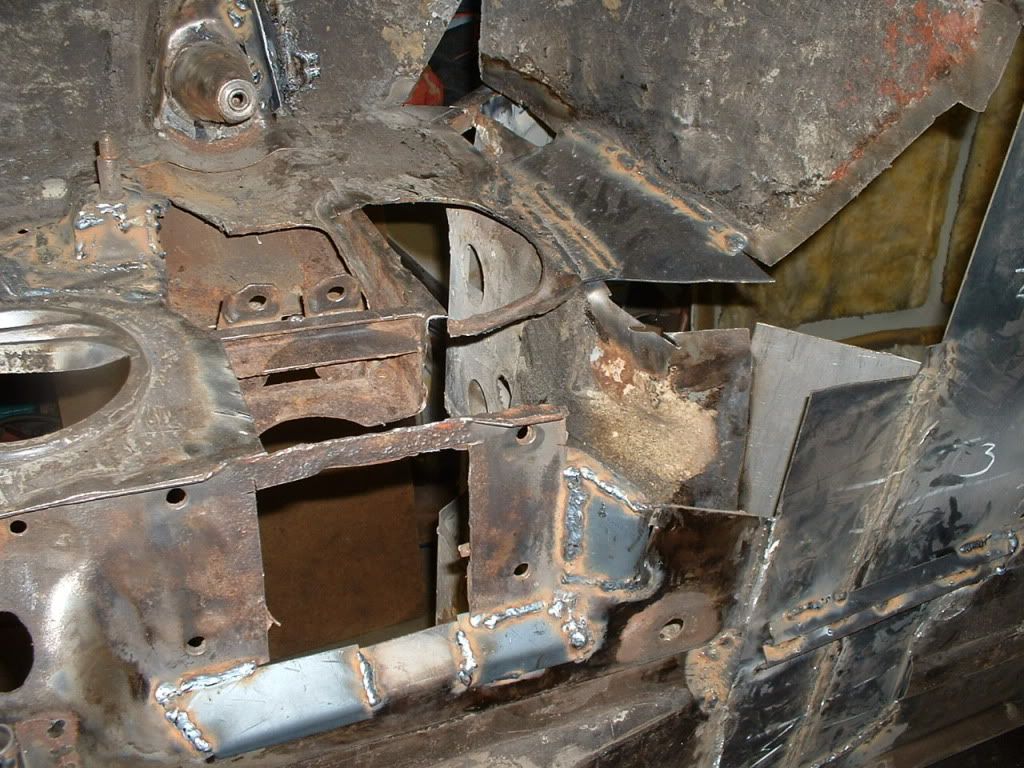
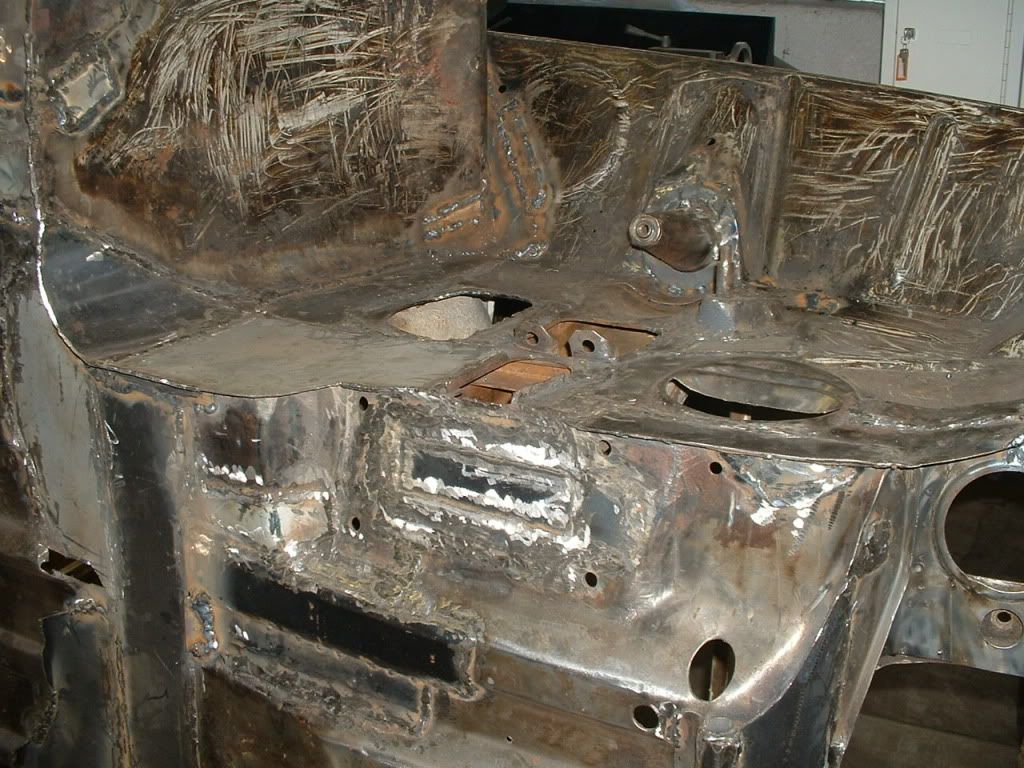
rear axel tunel partly welded
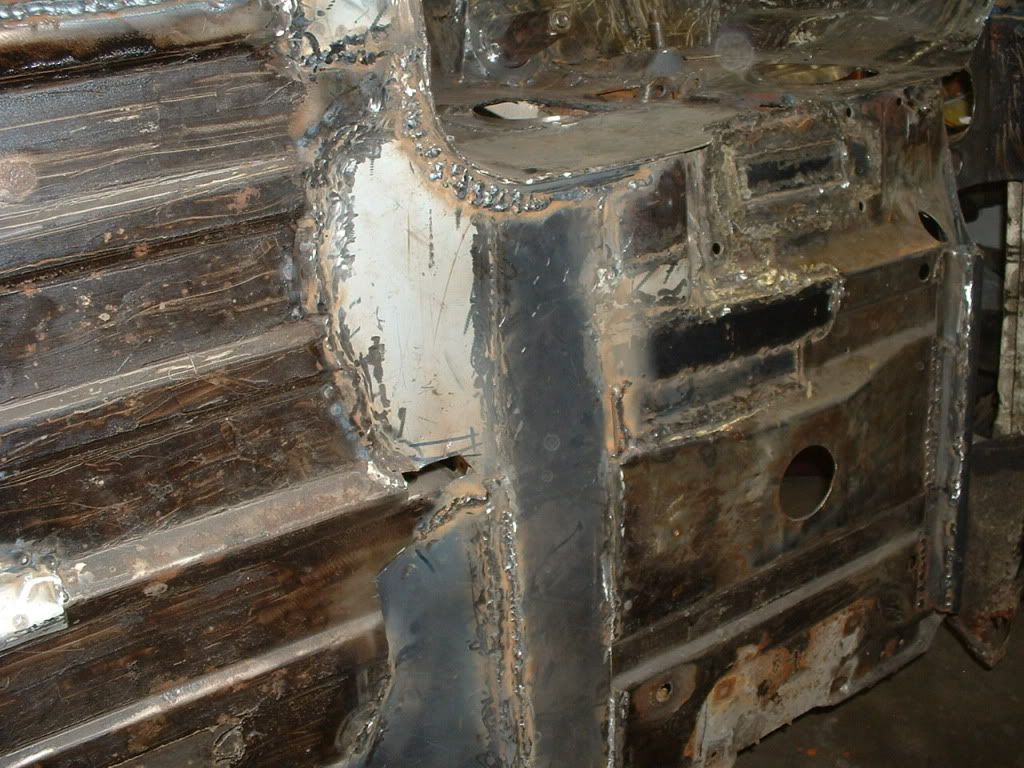
three panels joint (motor floor,passenger floor and division vertical panel)
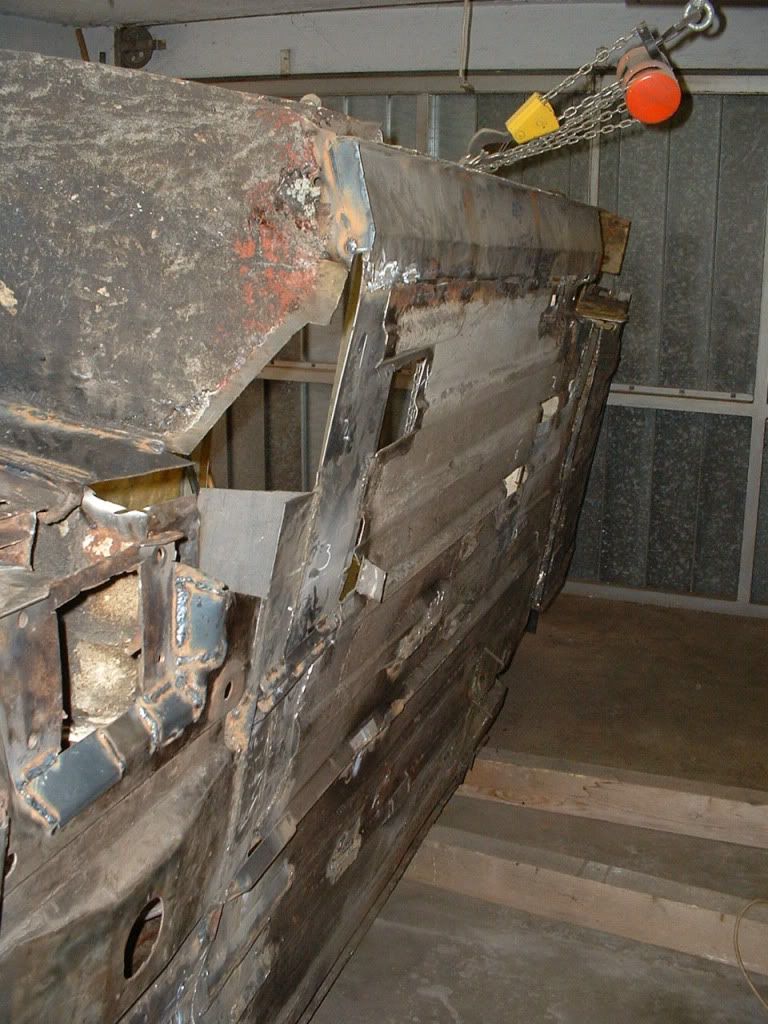
division panel from motor area
the same, left side
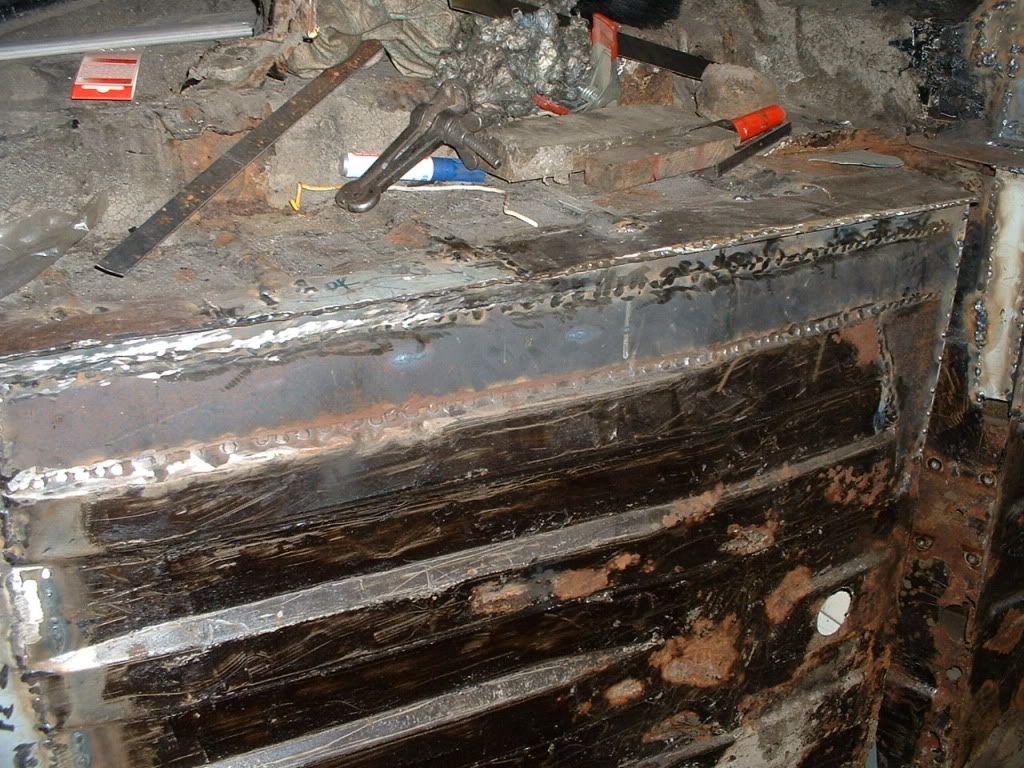
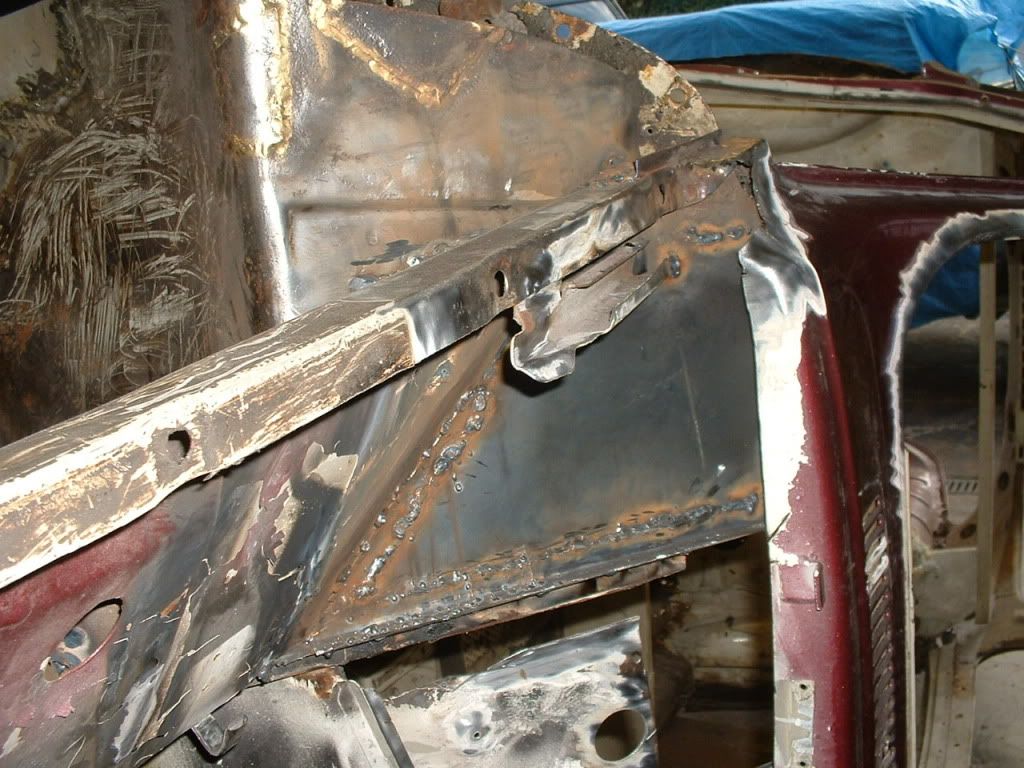
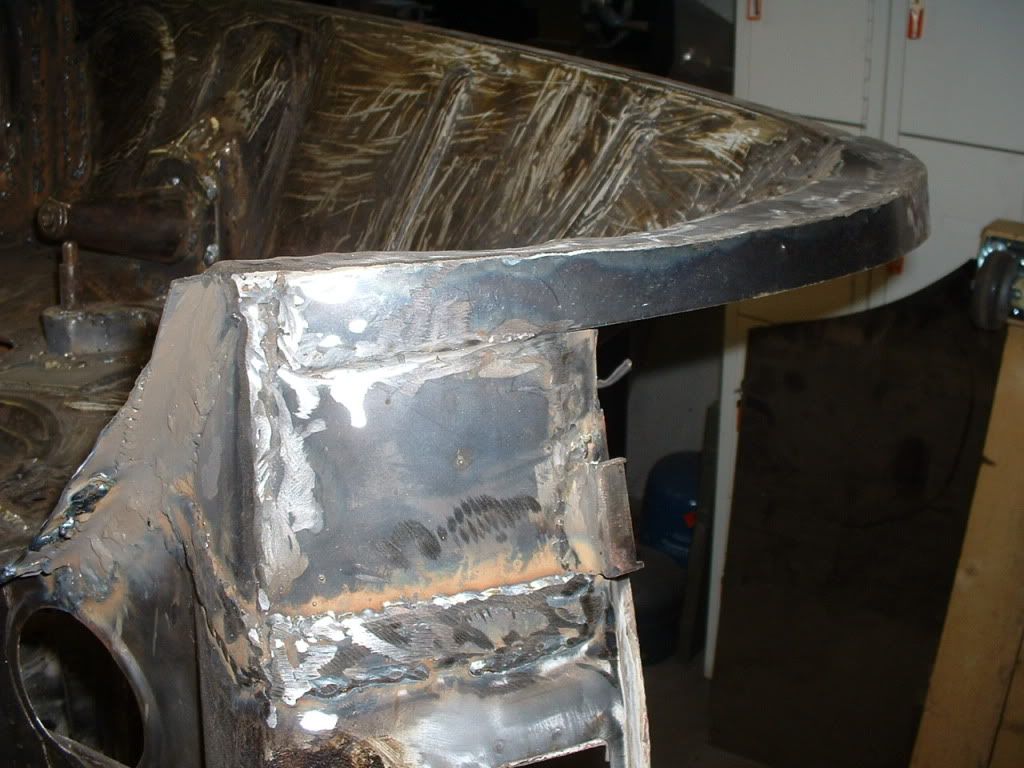
optimism is rising, luggage area comming in real form
back part of luggage area
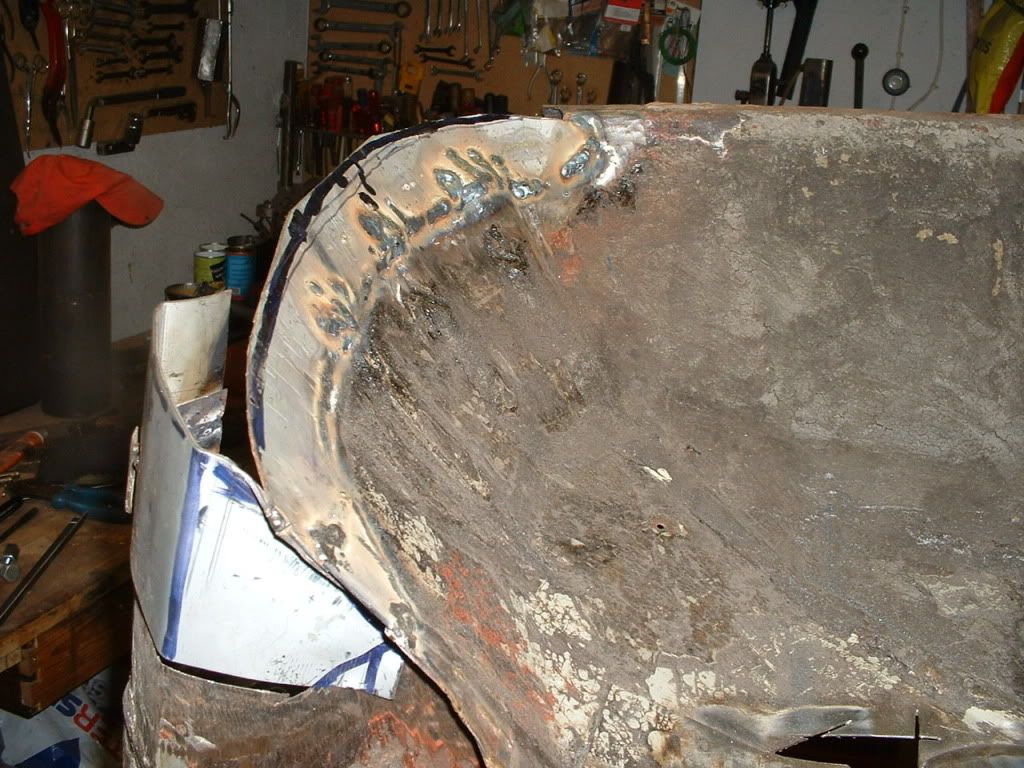
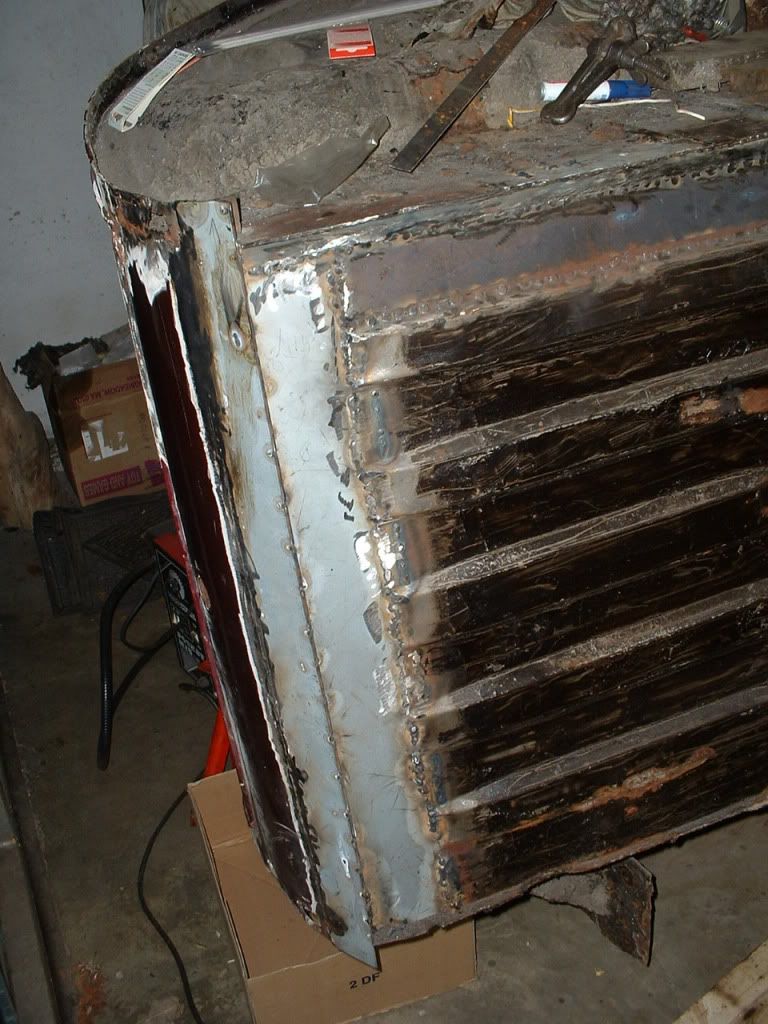
right inner fender finished
detail view of it
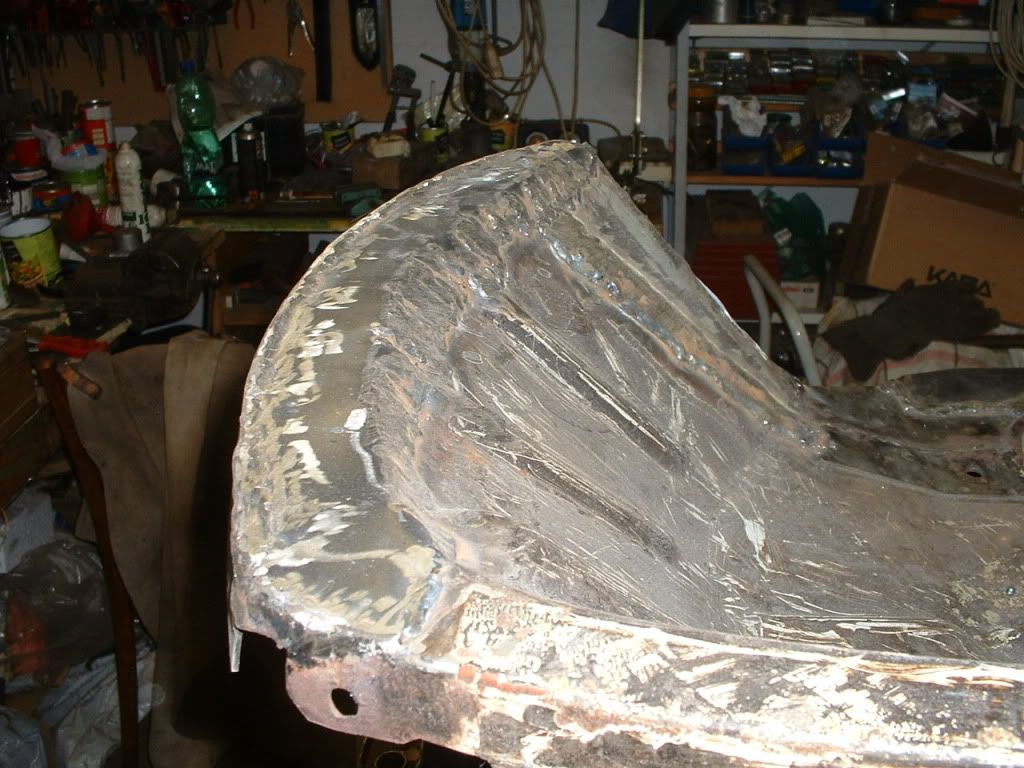
front part nearly terminated

finaly mooved higher to window frames
It seems it has no end, but it is a long story . I work on it already 3 years only saturdays partly sundays, evenings and during my hollidays. In 2010 I had a brake for 5 months, I cut also my hand, nearly lost left hand thumb, but the doctors have succesfuly saved it.
The nerves dont work, but this was not the case to stop me completely.
So you will see tomorrow the body completed, and works on motor, gearbox etc. |
| 15 L A T E S T R E P L I E S (Newest First) |
| Wheelspin | Posted - 13 Jun 2014 : 13:38:52
That's great info. I've had the chattering sound in mine for quite a while, but no problems so far.
And I must comply 100% with Melles last post. Exactly my thoughts. It's really great to see so much detail put into a car which most of us would consider beyond repair.
Regards, Mads |
| Lupo | Posted - 13 Jun 2014 : 13:09:36
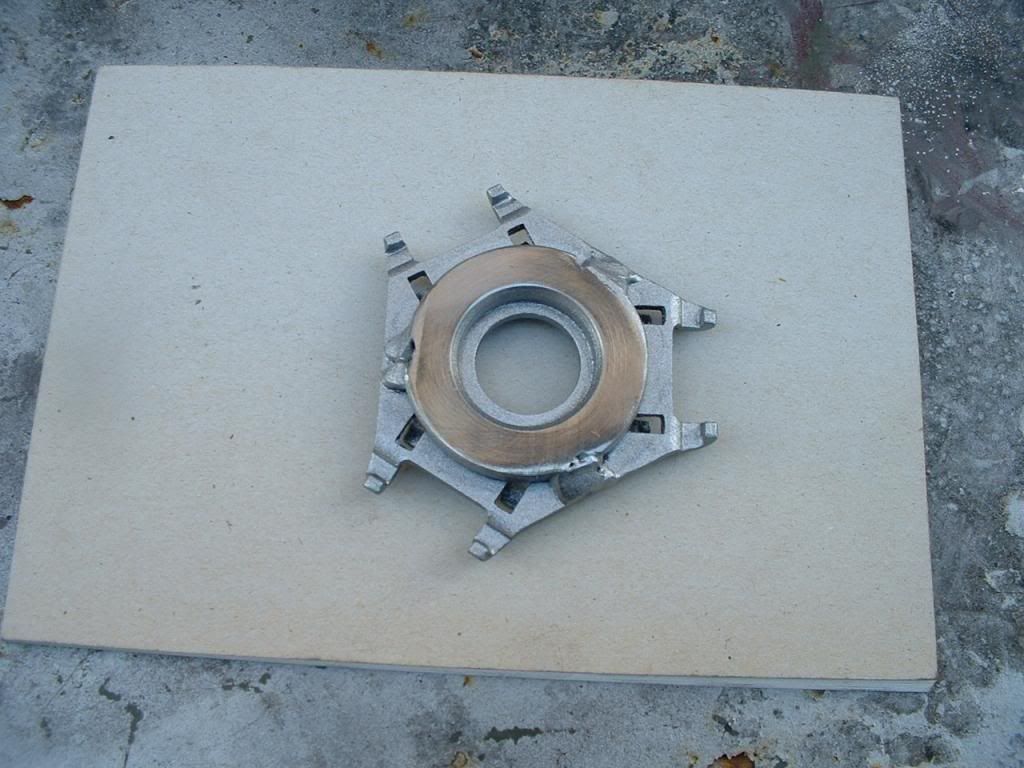
Back to clutch problem. Any time you hear the noise by deep clutch pedal that hits something (the nearest part to hit is retaining spring) immediately do an intervention otherwise you can destroy the retaining springs. (thats what happened to me). Once the motor is out you can measure the exact distance between release bearing and release plate (see photos).
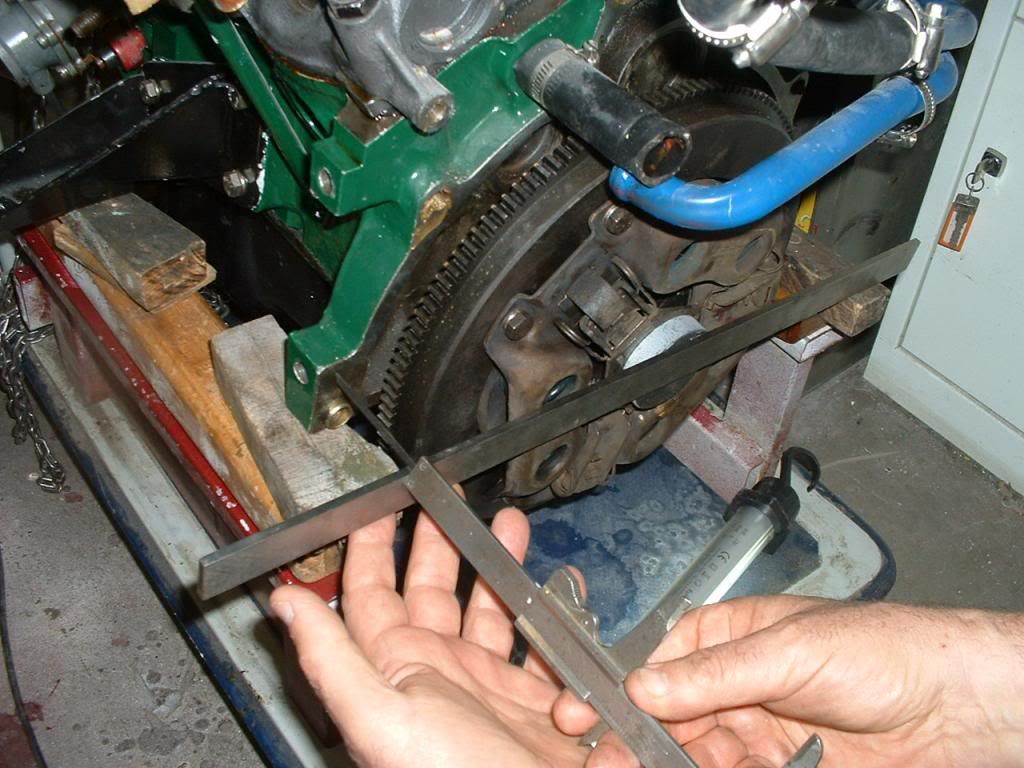
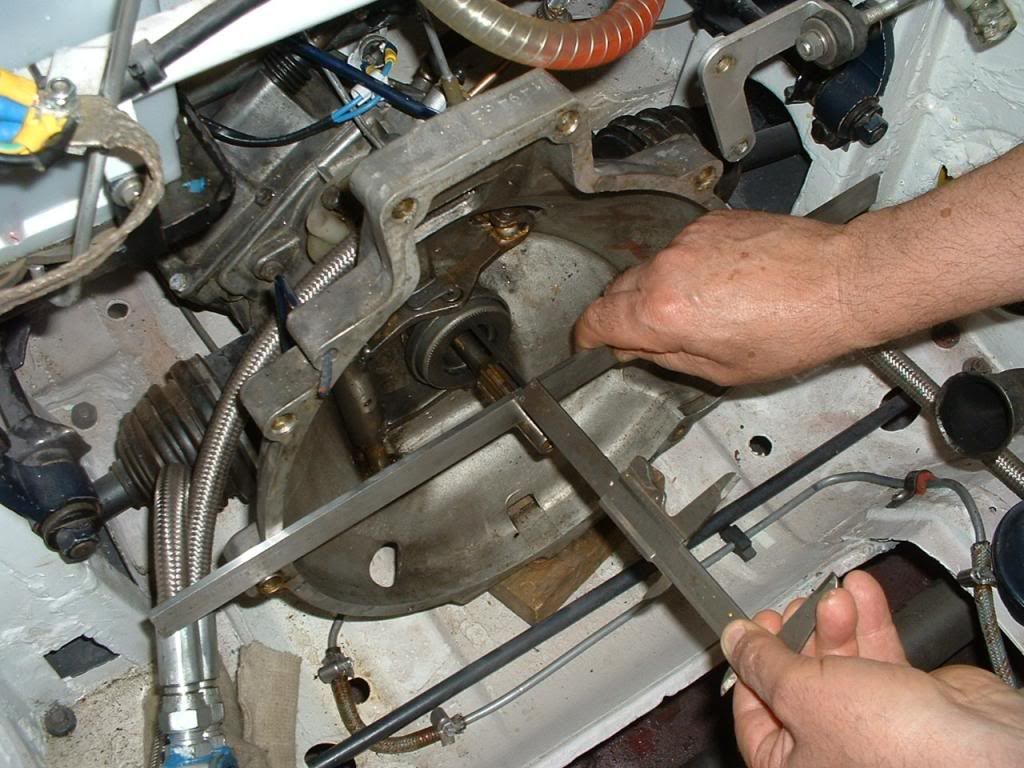
I decided to correct the extreme gap by welding a ring to release plate (see photo)
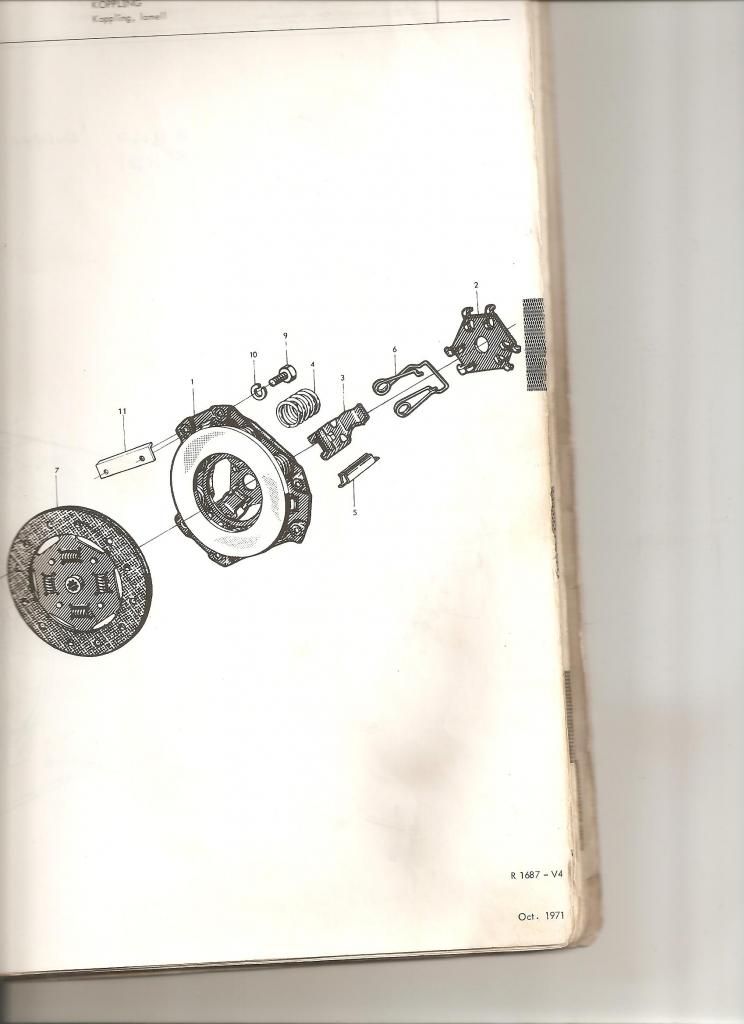
Later I discussed it with Steve from Malbrad, and he recommends using spacers between clutch cover and flywheel, which is absolutely correct and much easier. One can see on original spare parts list that there already were used spacers L profiles see pos. n° 11
 |
| melle | Posted - 13 Jun 2014 : 00:23:20
It may not be to everybody's taste but you've done an amazing job on that car Lupo!
1970 96V4 "The Devil's Own V4"
1977 95V4 van conversion project
1988 900i 8V |
| Zagato | Posted - 12 Jun 2014 : 21:11:26
Sorry to hear about the spring - typical!
They call purists in the Land Rover world "rivet counters" I'd love to see them confounded by yours  - good job - good job 
1977 96L Opal Green
|
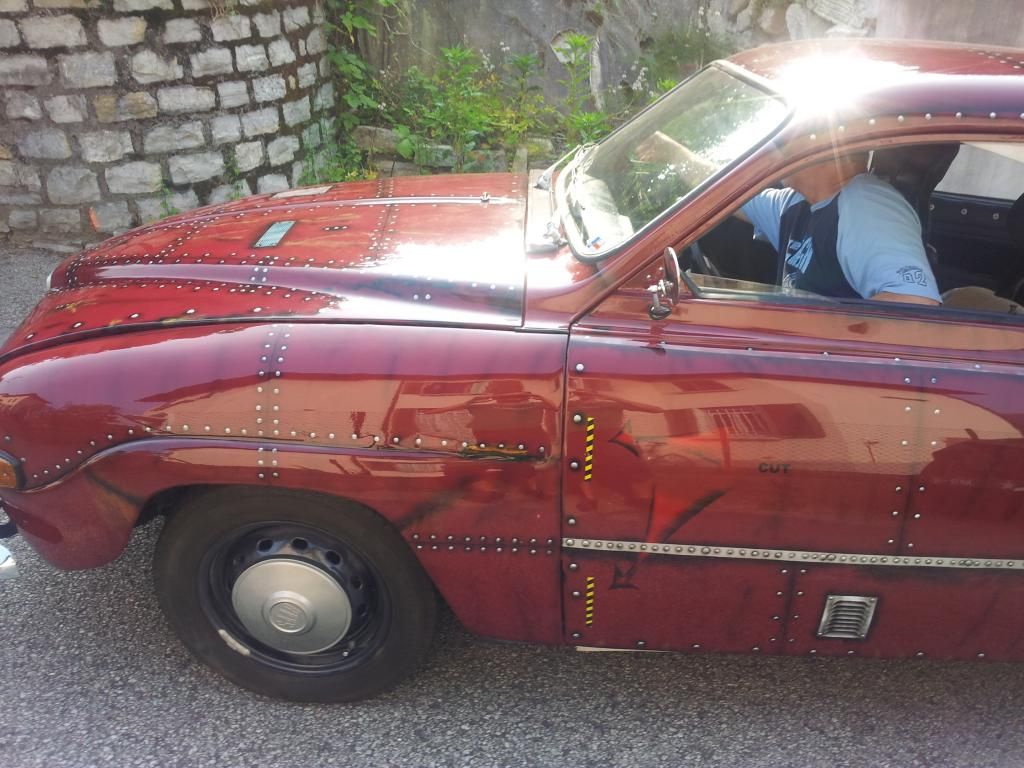
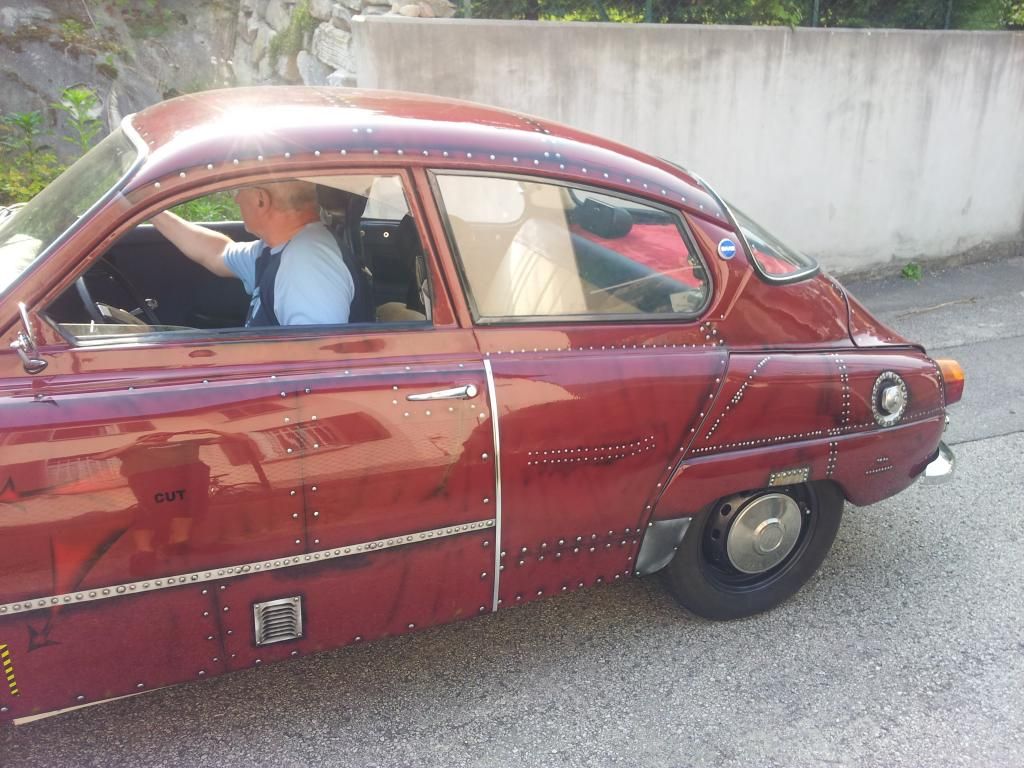
| Lupo | Posted - 12 Jun 2014 : 17:03:30
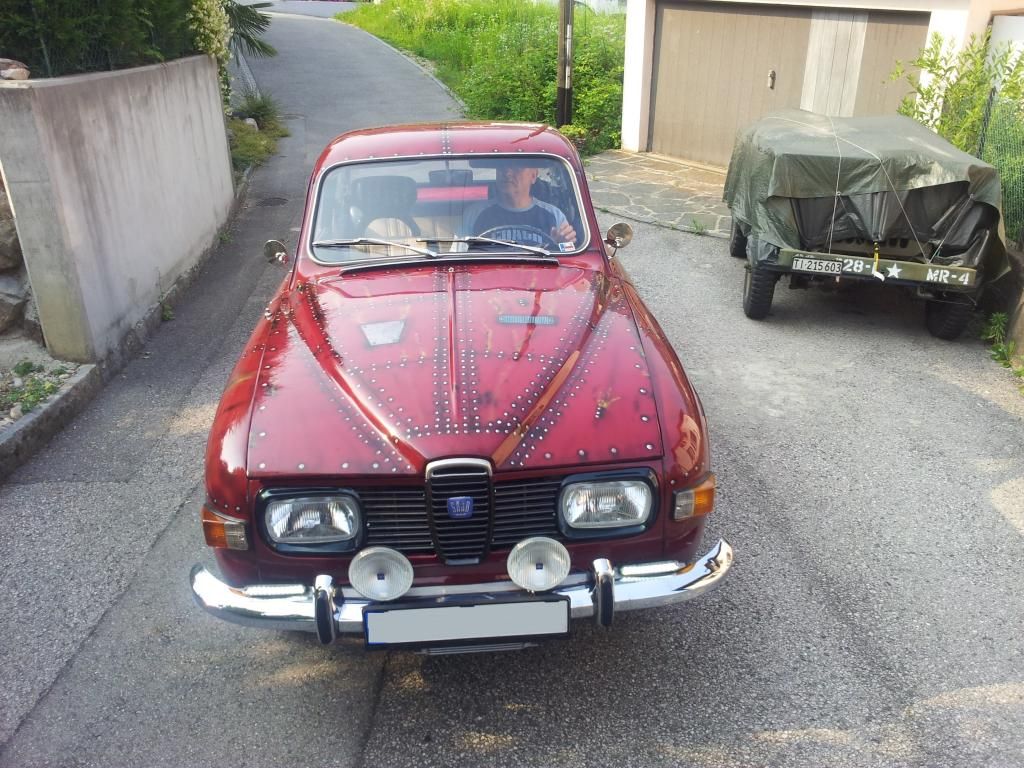
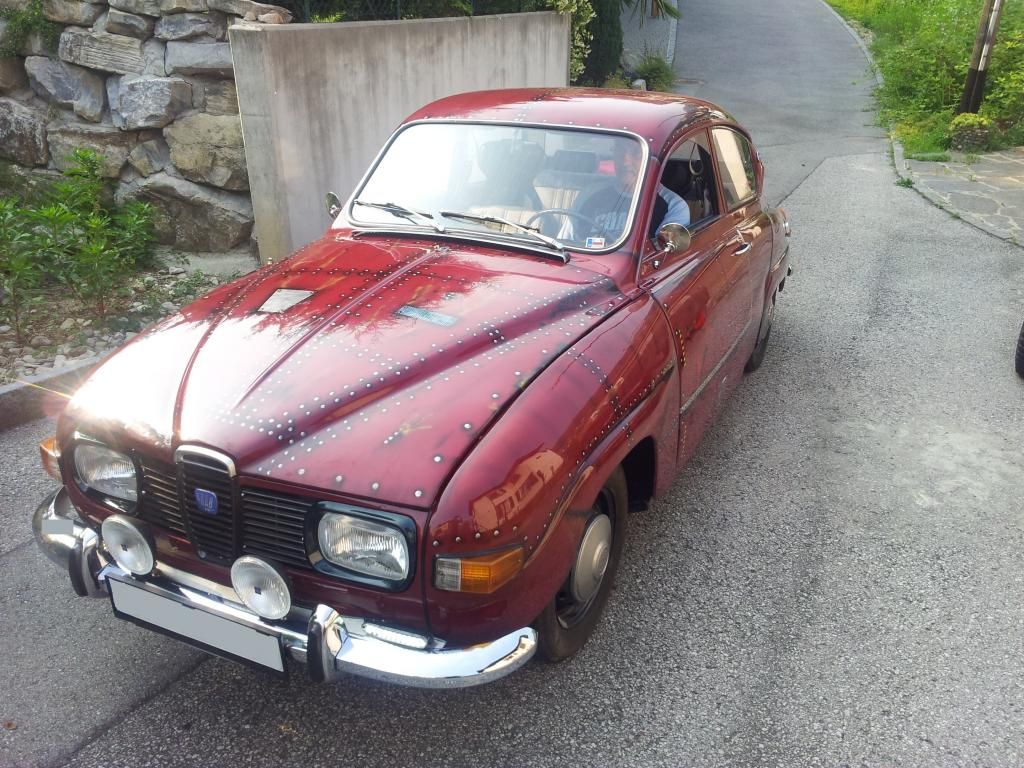
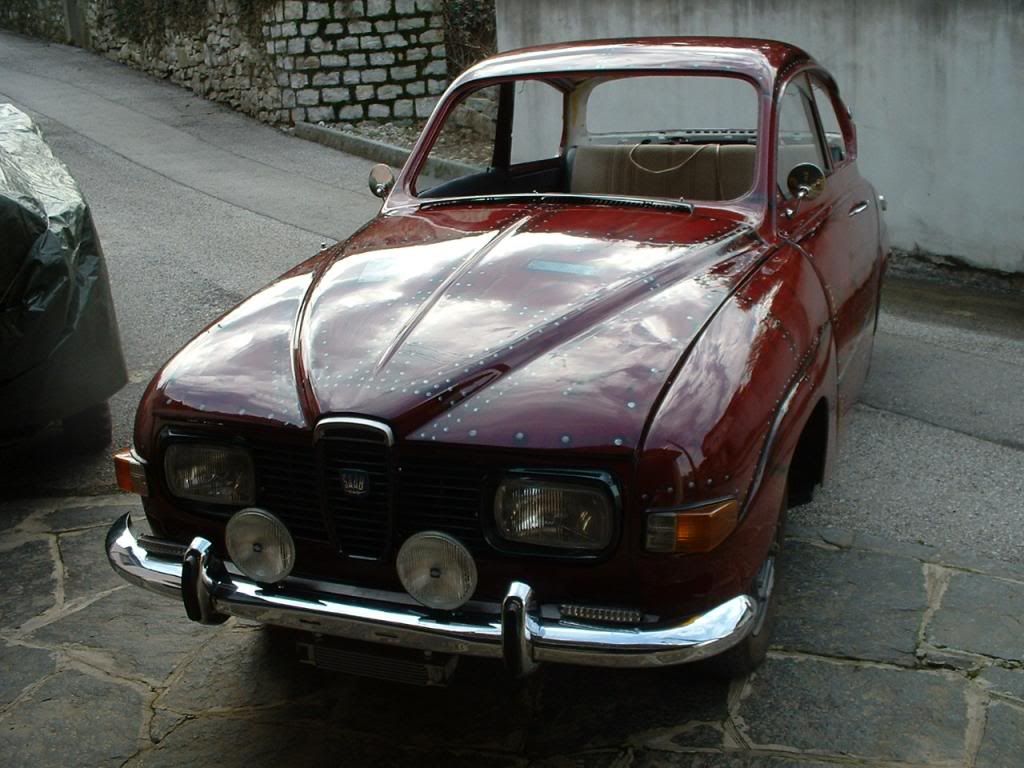
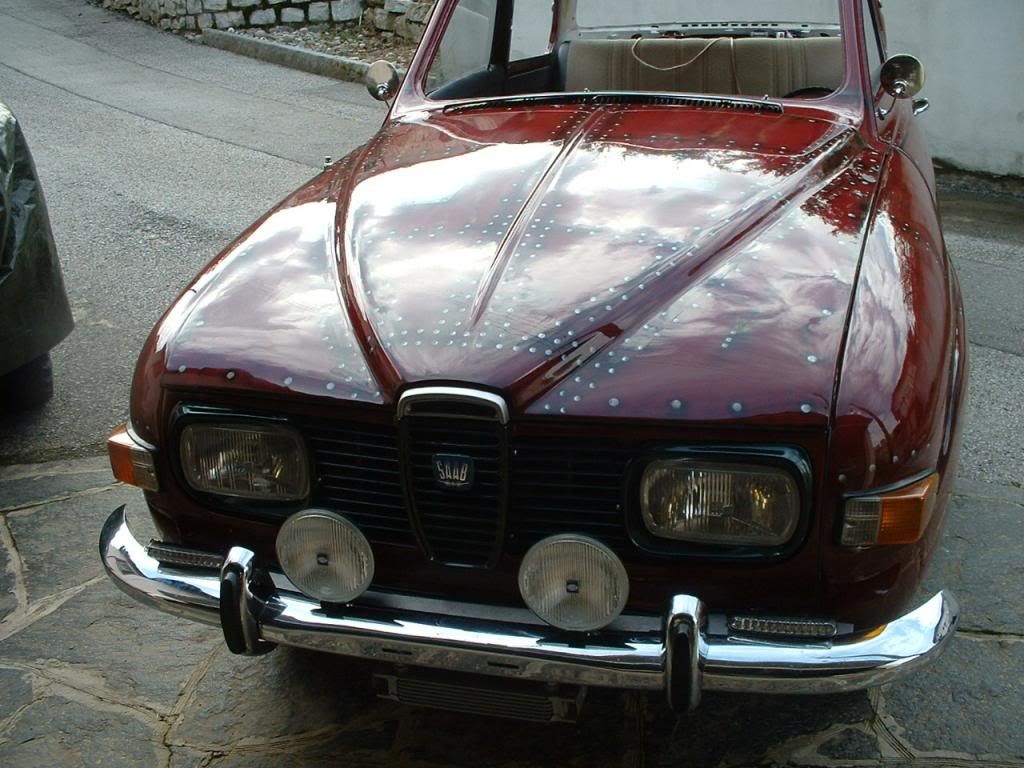
here are some photos from last Monday ride before the clutch spring broken. I ordered the spring from Malbrad already but the motor must go out again (I put it in before 2 weeks for another clutch repair)
 |
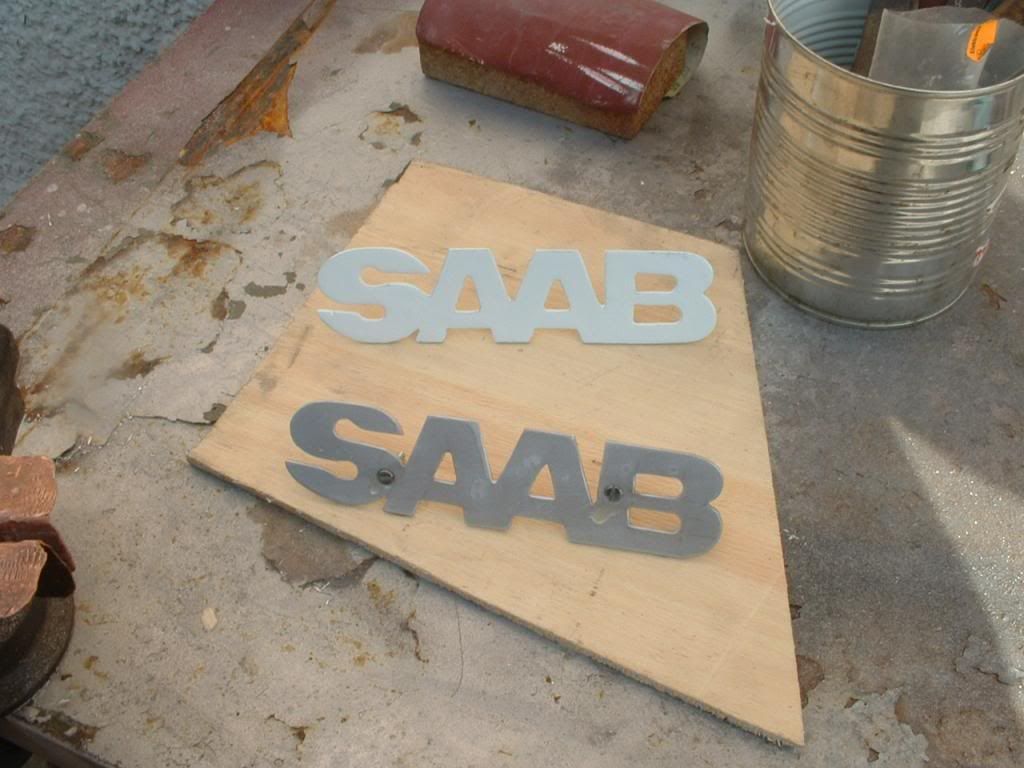
| Lupo | Posted - 10 Jun 2014 : 19:01:29
Hi guys, here are some small things Ive done lately.
2 hub cups were damaged so I tried to repair them here is the result.
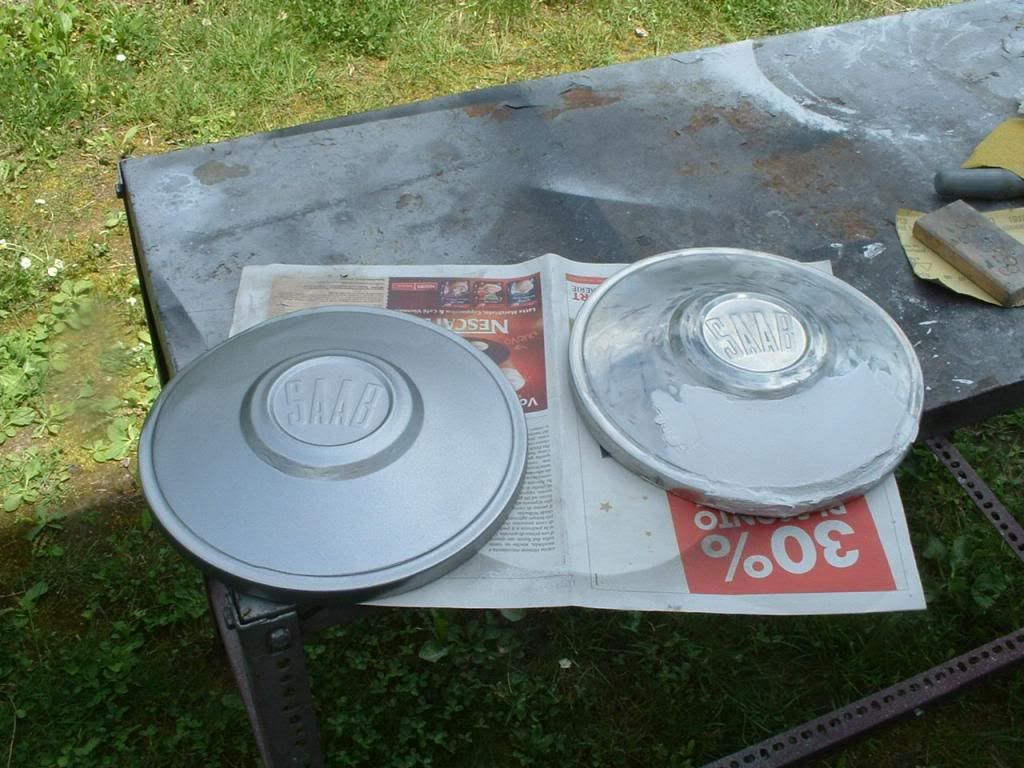
one ready, the otherone in process
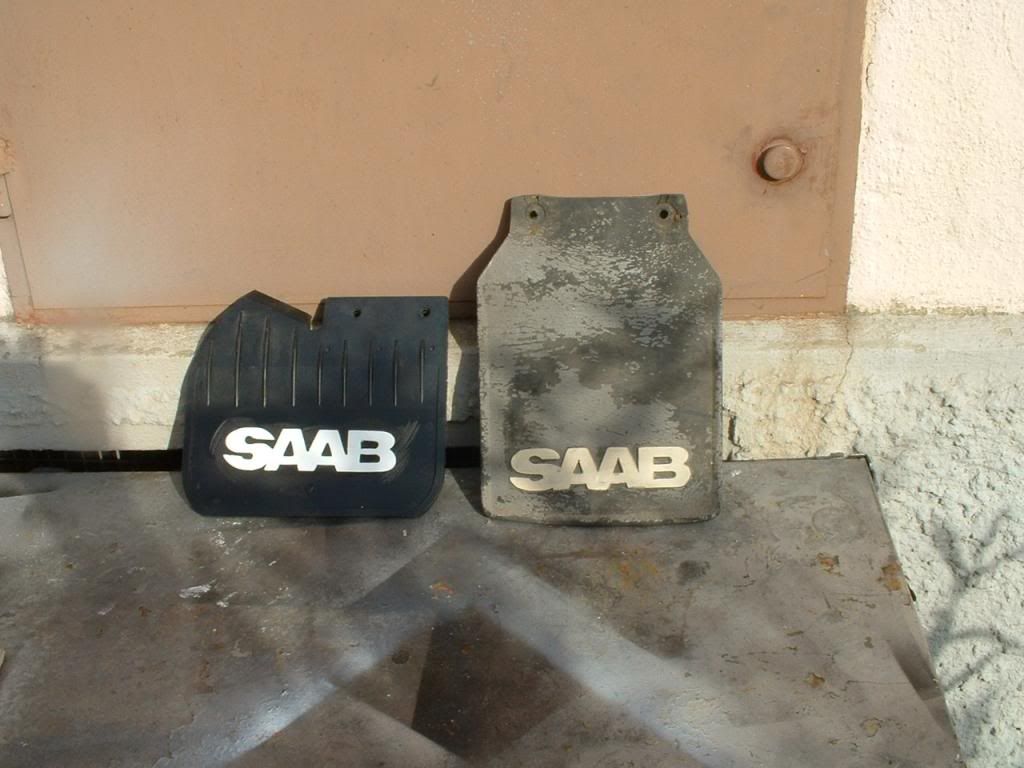
I cut the SAAB sign from 2mm thick Al sheet, white paint spray and fixed to universal mud flaps.
I visited local garage last week to be sure all OK, brakes checked on drum tester ok, lights adjustment done, toe-in adjusted. The car was running nice but...I found today strange parts under clutch (seems broken retaining spring). Ill check it with endoscope today.
|
| Lupo | Posted - 15 Mar 2014 : 20:20:23
Thanks Derek, I was in a hurry, so I finished the rear window today with the help of simple tools, but again 2 hours work for 2 persons and poor fingers. Anyhow its worth to have that tool (the garages dont have it today), Im going to buy one. |
| Derek | Posted - 15 Mar 2014 : 13:09:26
Here's me doing my rear strip. I didn't treat the rubber but just cleaned the groove and then wiped some glycerine along it. I did have to back track a couple if times but the whole job took less than half an hour. Front took a little longer because access is not quite as good. Done single handed but a helper would be useful just to hold the trim. The spreader tool is available from many places and you should be able to get one easily even over there. The chrome strip used here was the correct one with the wide foot, not the narrow Triumph Herald type.
http://www.ebay.co.uk/itm/Classic-Car-Windscreen-rubber-trim-fitting-tool-/331109203879?pt=UK_CarsParts_Vehicles_CarParts_SM&hash=item4d17a57fa7
|
| Lupo | Posted - 15 Mar 2014 : 11:54:38
Thanks Ian, I have the similar product, but disadvantage of soft lips is they don't keep in the hard lock strip, so you see what you hardly got in how it comes again out. Well, necessary to stay calm. |
| ianh | Posted - 14 Mar 2014 : 22:30:07
Hi Lupo, apart from using the special tool, it might be worth trying Duponts Krytox GPL105. It is available from VW and is used on the Eos roof seals, it makes the seals soft and pliable but it is expensive.If you google for Krytox or VW Eos roof seals you will find the properties of the product.
Ian |
| Lupo | Posted - 14 Mar 2014 : 21:32:53
Hi all,
has anybody a good idea how to insert a lock strip into rubber windschield or rear glass moulding. I managed to install windschield glass in its rubber moulding in one hour today but to insert the lock strip in 3 hours and two persons fingers destroyed. The rubber mouldings (very hard) and lock strips (large with both side lips) I bought by Jack Ashcraft. I let them 2 hours on sun (25 °C) to have them more flexible, but little change. I want to insert the rear lock strip tomorrow couldnt sleep well tonight.
|
| James Ranaldi | Posted - 21 Feb 2014 : 19:43:51
 
1968 V4, LHD
1984 99 GL |
| Lupo | Posted - 21 Feb 2014 : 17:16:53
Well, today I closed the bonnet, and Ill open it only when ready to connect the battery.
The nose with fog lights and led day lights.
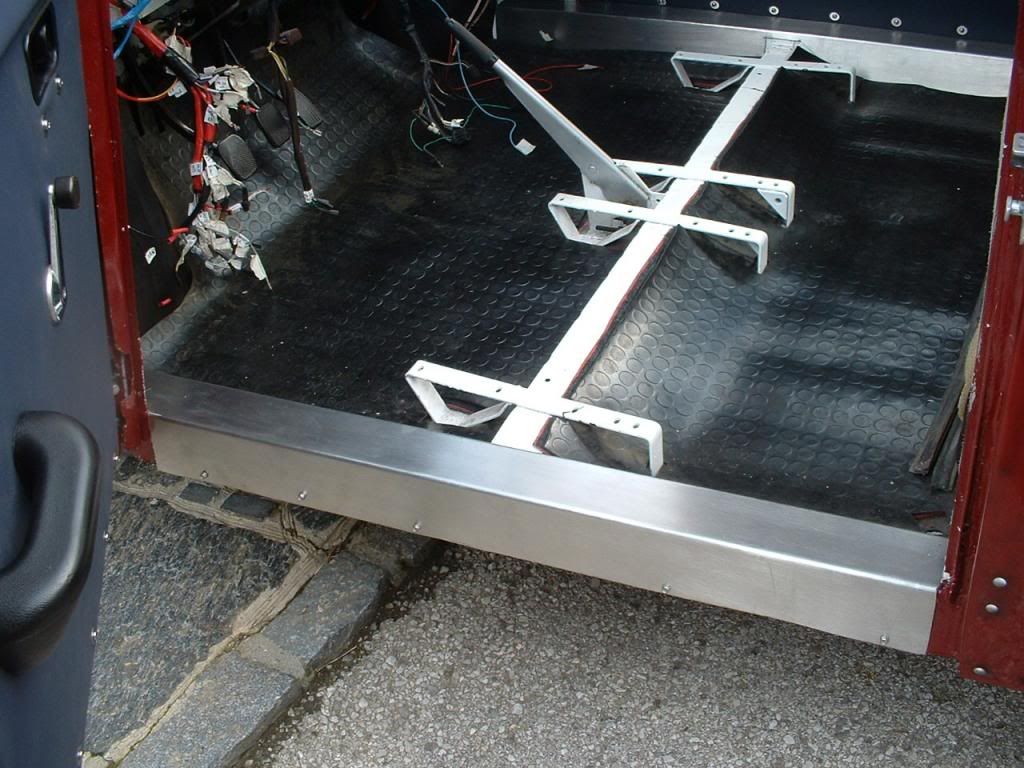
Door sills covers made from stainless steel
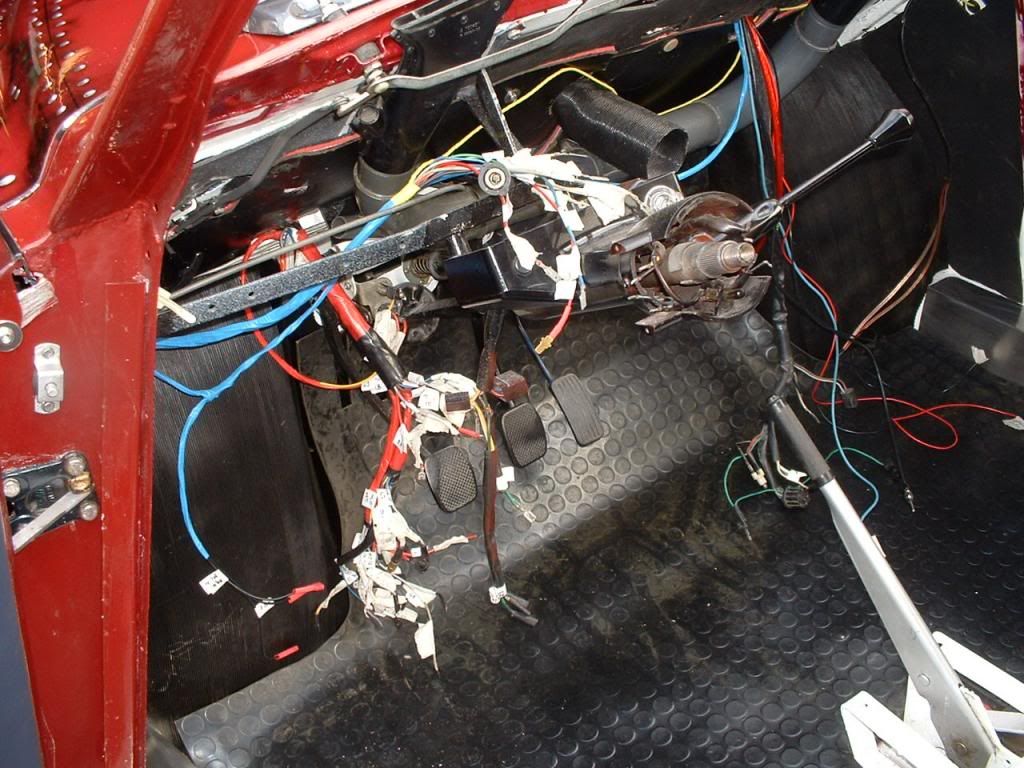
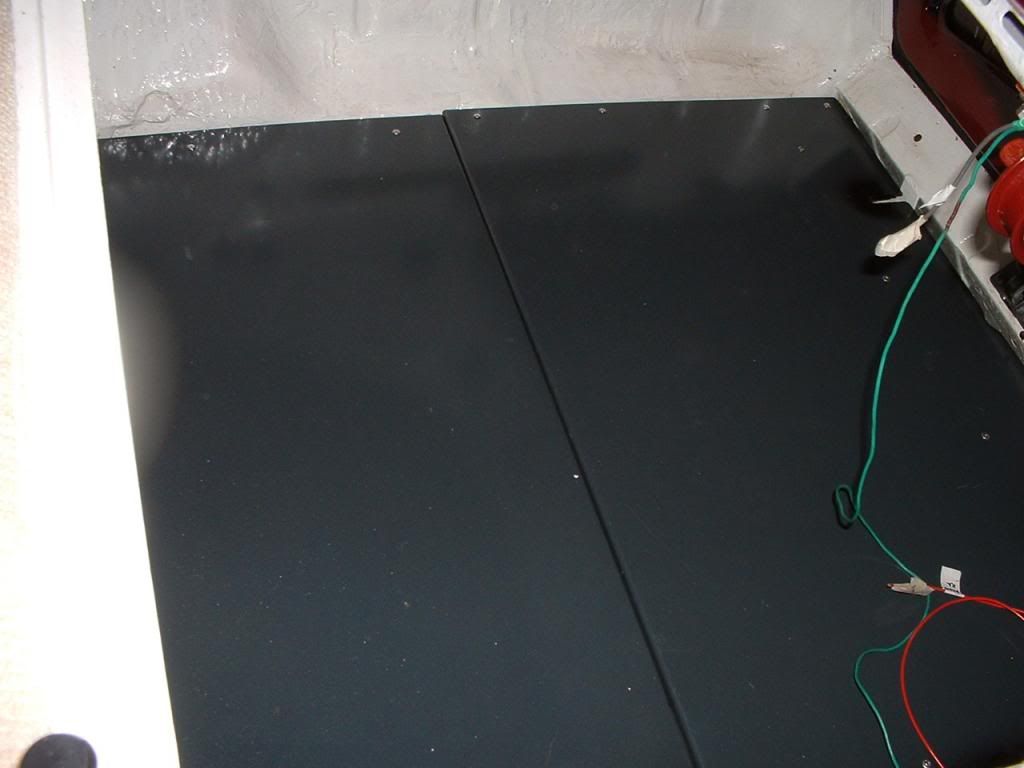
Wiring completely redone, new cables section choose always one grade bigger as I found some old ones burned. Each cable marked and two times controlled its function and position. Hope no error occurs. Ill try to plug in them next week.
 |
| hillbilly | Posted - 02 Feb 2014 : 18:38:25
Great work Lupo, I will be in your neck of the woods mid July can't wait to see the car.
|
| Lupo | Posted - 01 Feb 2014 : 10:52:18
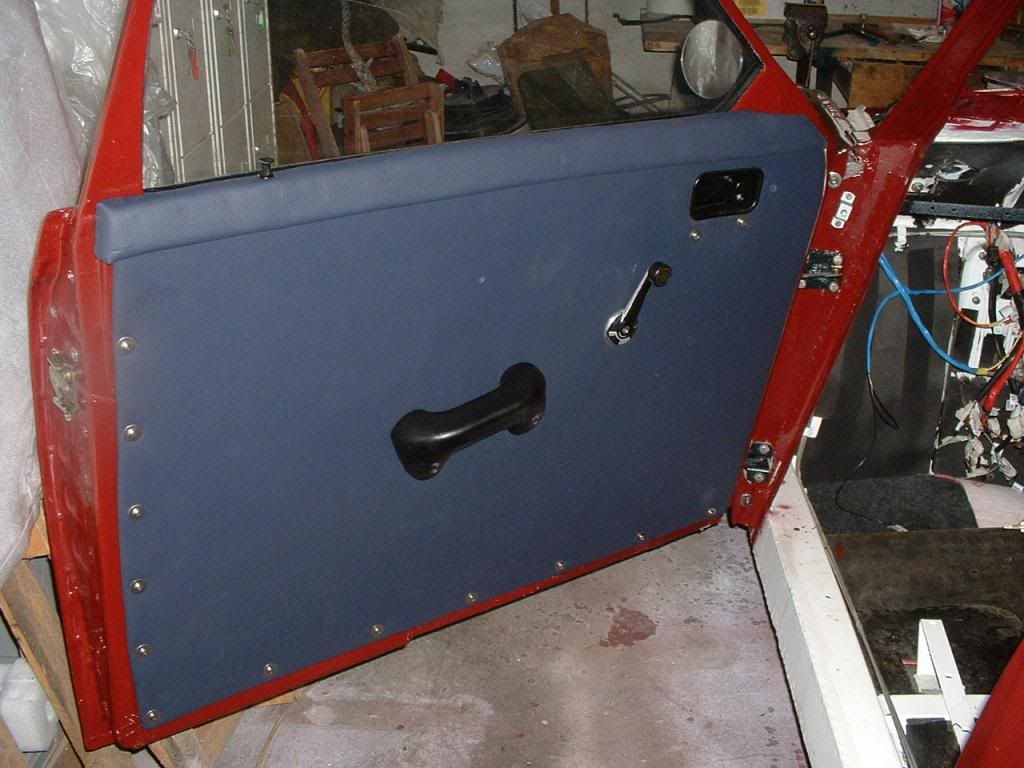
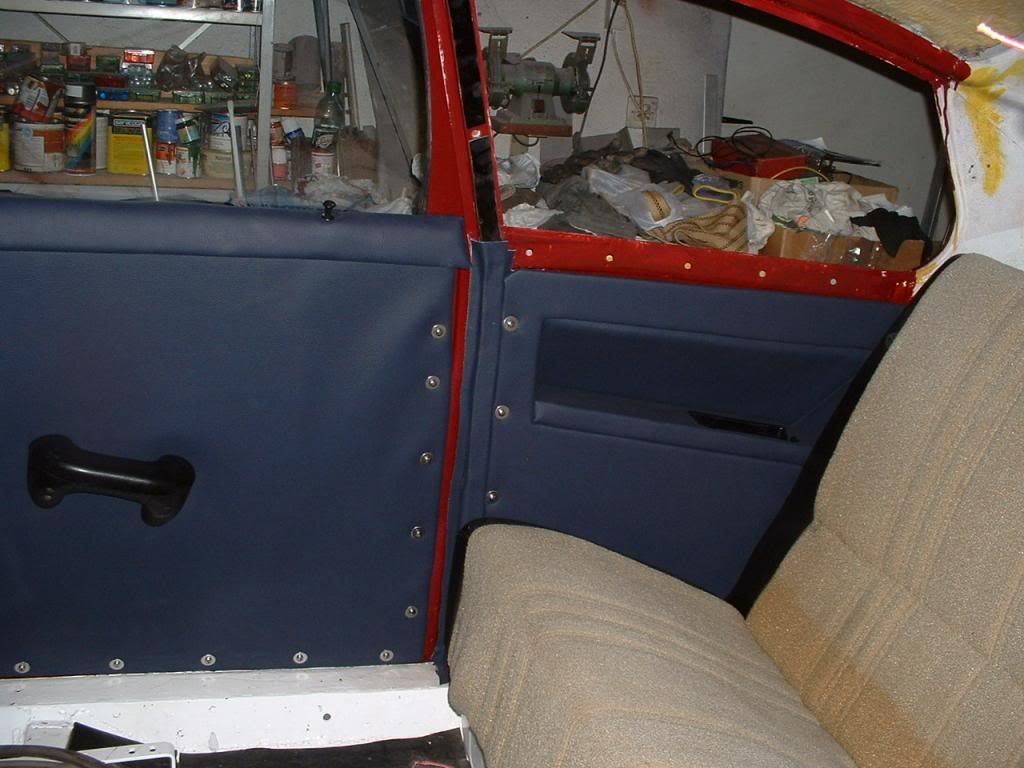
so here the doors complete, I used stailness steel screwa and washers instead of original clips as I find it more practical when take out panels, not to destroi them and the new panels are more thicker, and I prefer more industrial look (no chrome plastic strips)
rear panel
bottom of luggage space made from reinforced alu sheet
 |
